As an Amazon Associate, we earn from qualifying purchases. Some links on this site are affiliate links at no extra cost to you. Our recommendations are based on thorough research and editorial judgment.

Setting the On‑Time Duration on Outdoor Motion Lights
1. Purpose: Motion light on‑time sets illumination duration after detection, balancing security and energy use, typically 30–60 seconds for paths, 2–5 minutes for driveways, 10–30 minutes for service entrances. 2. Controls: Use TIME, LUX and SENSITIVITY settings to adjust duration, ambient lux threshold, and detection range up to 12 m. 3. Procedure: Access the TIME dial or menu, make incremental changes, test activations, document final settings. Further sections explain adjustment steps, testing procedures, and troubleshooting.
Key Takeaways
- Set on-time to match typical occupancy patterns—short for quick paths, longer for driveways and service entrances.
- Use 30–60 seconds for short pathways, 2–5 minutes for driveways, and 10–30 minutes for service or high‑traffic areas.
- Balance TIME with LUX and SENSITIVITY: reduce on-time when sensitivity is high or ambient light makes long illumination unnecessary.
- Adjust TIME incrementally and test by walking detection zones, recording activations, then finalize settings after several trials.
- Call a professional if lights won’t reset, breakers trip, or wiring and weatherproofing problems are suspected.
Why Motion Sensor Lights Need Adjustable On‑Time
- Motion sensor lights require an adjustable on-time duration to align illumination with occupancy patterns, conserve energy, and promote safety.
- Technical rationale: adjustable on-time duration, typically set between 15 seconds and 30 minutes, permits tuning of post-trigger illumination to application-specific dwell times, reducing duty cycle and energy consumption.
- Implementation guidance: set 30–60 seconds for short pathway crossings, two to five minutes for driveway usage, and ten to thirty minutes for service entrances; test settings during peak activity.
- Operational considerations: proper configuration prevents nuisance activations, guarantees responsiveness to real motion, and balances lumen output versus power draw.
- A wall mount LED light‘s long lifespan and energy efficiency can enhance outdoor motion sensor light performance by reducing maintenance and energy costs.
- Conclusion: verify settings seasonally, adjust as occupancy patterns change. Record runtime and ambient lux levels, use timers or manual overrides, and consult manufacturer specifications.
Understanding the TIME, LUX and SENSITIVITY Controls

Section 1 — Overview: the TIME, LUX, and SENSITIVITY controls together determine when a motion light will switch on, under what ambient illumination it will operate, and how large an area will trigger it, so understanding their ranges and interactions is essential for reliable, energy‑efficient operation.
- Function: TIME sets run duration 5–15 minutes, selectable in increments for brief or extended coverage, and affects duty cycle and lamp life.
- Ambient threshold: LUX sets activation based on lux levels, commonly 0–2000 lux, permitting night‑only operation or daytime triggering when lower thresholds are chosen.
- Detection range: SENSITIVITY adjusts detection distance, often 3–12 meters, and can be reduced to avoid false triggers from distant movement.
- Integration: Combined adjustment optimizes security, conserves energy, reduces nuisance activations. Motion sensor bollard lights typically have a PIR range of 5-12 meters, ensuring effective coverage for outdoor pathways.
Recommended Products

Dusk to Dawn Technology – Keep your home as efficient as possible, with dusk to dawn technology the animated flame bulb will immediately ignite when the sun starts to set

【Built-in 2 Outlet】The outdoor lights for house is equipped with two GFCI outlets (ground fault circuit interrupter), accommodating both two-pronged and three-pronged plugs. This setup provides convenient outdoor power access while also offering enhanced safeguards against power surges, short circuits, and other electrical issues.This outlet is suitable for various scenarios, including string lights, lawnmowers, BBQ grills, CCTV cameras, and other outdoor equipment.

DESIGN - ASD LED security camera outdoor wired with a motion sensor is a great way to keep your home safe at night. Side-to-side (150°) and up-and-down (180°) square rotatable light heads allow you to direct light where it is needed. It is designed to operate on 120V circuits
Deciding the Right On‑Time for Your Property

Choosing an appropriate on‑time requires an assessment of typical movement patterns, detector sensitivity settings, and the intended function of the fixture, because these parameters collectively determine whether a shorter duration will prevent nuisance activations or a longer duration will provide adequate coverage for safe transit. 1. Assessment: Identify peak traffic times, frequency of motion, and transit distances, and use a baseline on-time duration of 1 to 5 minutes for typical domestic pathways, extend to 10–15 minutes in high-traffic zones. 2. Sensitivity interaction: Higher detector sensitivity should prompt shorter time settings to reduce false triggers, while lower sensitivity may need longer durations for reliable coverage. 3. Implementation and testing: Perform iterative trials, record results, and adjust to balance energy use and effective outdoor lighting consistently. Additionally, consider using dimmable lighting options to customize brightness and further optimize energy efficiency.
Recommended Products

64 CHANNEL SECURITY CAMERA SYSTEM: This system has 48pcs 5MP 2.8mm fixed lens PoE IP cameras with built-in microphone, IP67-rated waterproof for indoor and outdoor use. The 4K 64CH NVR of this system comes with 2X 8TB hard drive. it has 8 SATA port to expand to total 80TB storage space.

MULTI-ZONE SYSTEM: Includes multiple indoor air handlers for individual rooms connected to a single outdoor condenser. Each indoor unit features independent temperature control settings.

32 CHANNEL VANDAL-PROOF SECURITY CAMERA SYSTEM: It has 24pcs 5MP 2.8mm fixed lens (Not PTZ) camera produced with IK10 vandal-proof and built-in microphone. The 4K 32CH NVR of this system comes with a 8TB hard drive. it has 2 SATA port to expand to total 16TB storage space.
Step‑by‑Step: Adjusting the TIME Setting

When adjusting the TIME setting, the installer should first confirm the fixture model, review the product manual, and gather required tools, including a 2–3 meter ladder and insulated screwdriver. 1. Locate controls: identify the dial or button marked “TIME” on the sensor housing, note plus and minus indicators, and verify scale in seconds or minutes for that model. 2. Set interval: use the plus or minus to select a desired interval, common presets include 30 seconds, 1 minute, and 5 minutes, adjust incrementally to suit site conditions. 3. Test and fine-tune: walk through the detection zone, observe duration after activation, record results, and refine the TIME setting to balance illumination with energy use. Document final setting in maintenance log for future reference and seasonal adjustment, periodically verify. For optimal performance, ensure that your battery-powered security lights are installed at the recommended height of 1.8 to 2.4 meters to maximize coverage and minimize false triggers.
Recommended Products

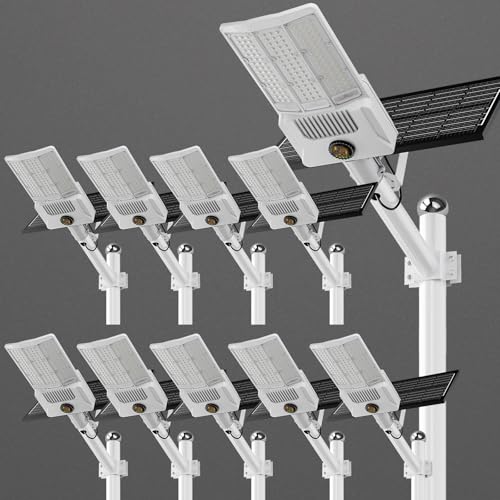
HIGH BRIGHTNESS SOLAR STREET LIGHT – Experience superior illumination with this commercial solar street light. Equipped with high-efficiency LEDs, it serves as a powerful solar powered street light that delivers intense brightness, perfect for acting as large solar street lights outdoor waterproof solutions for expansive areas.

【High-power LED】:This solar lights outdoor features 144 ultra-bright 5054 high-power LED beads, equipped with convex lenses that focus the light for greater distance.Provide lighting up to 3800sq.ft. It delivers high brightness while consuming less power,making the solar street light more energy-efficient, longer-lasting, and safer to use

Super Bright Solar Street Light: This 8000W solar street lights outdoor waterproof is equipped with 1080 high-efficiency 5730 SMD LED beads, delivering an impressive of ultra-bright illumination. With a long lifespan and minimal light decay, it provides reliable lighting for large outdoor areas, covering up to 3600 square feet.
Troubleshooting When On‑Time Won’t Change

- Verify TIME control precision: confirm the TIME setting responds to plus and minus indicators for incremental adjustment, press and hold for seconds if required by manufacturer, observe digits change within 1–120 seconds range depending on model.
- Inspect electrical interface: test the wall switch and circuit using a multimeter, assure line voltage is present and the switch closure is reliable, reset power by turning the circuit off for 30 seconds to clear surges that lock parameters.
- Check sensor optics and consult documentation: clean the outdoor motion sensor with a soft cloth and isopropyl wipe to remove dust, refer to the user manual for model‑specific reset procedures or errno codes when adjustments remain ineffective. If unresolved, contact manufacturer support for guided diagnostics immediately.
- Consider the weather resistance of your outdoor motion light, as models with an IP65 or IP66 rating ensure resilience against environmental factors that might affect sensor performance.
Recommended Products

OPENLUX Only Make High-Quality: Our LED post top light is ETL listed made of SMD3030 LED chips; High-end driver; heavy-duty aluminum Anti-shock, anti-moisture, no glare, no strobe light, protecting your eyes

Total Property Coverage with Revolutionary 2-In-1 Design: Secure every corner of your property with zero blind spots. In this 4-camera bundle, every single device does the work of two. The innovative Triple-Lens system combines an upper 4K bullet lens (130° wide view) with a lower 2K PTZ lens that locks on, tracks, and zooms. Get both the complete scene and crucial close-ups at the same time. It’s the perfect all-in-one security solution for large estates, sheds, rental.

【Energy Saving& Large Area Illuminating 】400W LED street light used highest brightens SMD3030 LED chip, with output 100000lm in 5000K daylight, Ideal subsitution for 1600 HPS/MH tranditional lights, reduce your electronic bill by up to 85%.T3 lens technology boosts light efficiency, illuminating 11300ft²large area at 30FT-55FT height.
Energy‑Saving Tips for Motion‑Activated Lighting
Prioritize reducing unnecessary run-time by calibrating sensor on‑time to the lowest interval that still provides adequate detection and deterrence, typically 60–300 seconds. 1. Set on-time: configure outdoor motion light timers to 60–300 seconds (1–5 minutes), this minimizes energy use while maintaining security. 2. Adjust sensitivity: tune motion sensors to limit activations from pets, traffic, and vegetation, reducing false triggers and lamp cycling. 3. Power options: install solar‑powered motion-activated fixtures with appropriate panel orientation and battery capacity to cut grid consumption. 4. Maintenance: clean sensor lenses quarterly to prevent prolonged activation due to impaired detection. 5. Scheduling: integrate a time clock with motion sensors to restrict operation to defined nighttime hours, maximizing efficiency and lowering costs. Monitor performance of motion sensors, adjust settings according to measured energy use.
Recommended Products

【Say goodbye to darkness and high electricity bills】Tired of dark driveways or expensive electric bills? This solar street light provides a powerful 25000W equivalent brightness using 0 electricity. Simply mount it outdoors, and it charges automatically during the day. You get a reliably lit property at night without increasing your monthly expenses or needing complex wiring, giving you peace of mind and instant savings.
【End Power Outage Worries & Enjoy Continuous Illumination】: Featuring a powerful 55000mAh battery and 30% high-efficiency solar panel, this solar light outdoor stores ample energy during the day, ensuring reliable dusk-to-dawn lighting even on cloudy days. You gain consistent, worry-free outdoor security without rising electricity costs or wiring hassles.
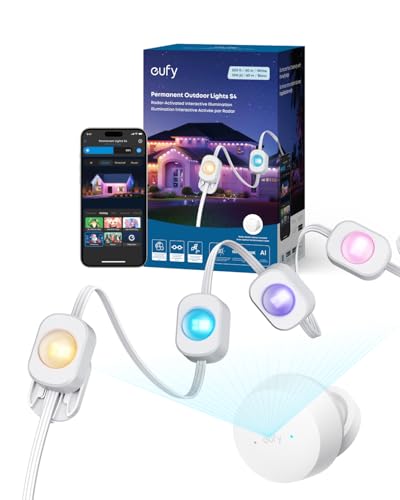
3-in-1 Lighting for Daily, Holiday, and Security: With 120°, 12 m radar coverage, this smart light strip offers precise motion detection for automatic lighting effects that follow your movement. Set customizable security alerts with flashing warnings to deter intruders.
When to Call a Professional Electrician
- When to call a professional electrician: If outdoor lights fail to respond after multiple resets, a licensed electrician should inspect wiring, connections, and control modules to identify faults that exceed homeowner troubleshooting capabilities.
- Visible damage and water intrusion: Frayed wires, corrosion, or moisture inside fixtures present shock and fire hazards, stop use immediately, and arrange professional repair or replacement.
- Repeated breaker trips and sensor faults: Persistent circuit breaker trips linked to the lighting circuit, or sensors that remain unresponsive despite adjustment, require diagnostic testing with a multimeter, insulation resistance tests, and possible component replacement.
- Code compliance and reliability: Consult an electrician to verify installations meet local codes, correct grounding, appropriate conduit sizes, and secure mounting, for long-term dependable operation.
- Ceiling PIR sensors should perform adequately in extreme temperatures, both hot and cold, but consider models specifically rated for diverse environmental conditions to ensure reliable performance and longevity.
Frequently Asked Questions
How to Adjust Motion Sensor Light Time Duration?
Twist time dial to set duration; they perform Sensor Calibration by testing motion, adjust gradually, recheck sensitivity, and observe environmental factors like foliage; repeat until desired on‑time is achieved for reliable, responsive outdoor illumination performance.
How to Adjust Outdoor Motion Sensor Light Settings?
They adjust outdoor motion sensor light settings by rotating TIME for duration, tuning Sensor Sensitivity for detection range, setting LUX for daylight cutoff, selecting mode (auto/test/manual), and testing repeatedly to confirm desired performance in situ.
How to Make a Motion Sensor Light Stay on All the Time?
Like a lighthouse holding night, they set the sensor to override and max TIME, toggle switch sequence, adjust LUX to permit Continuous Activation, correct mounting and clean lens guarantee persistent illumination for continuous security now.
What Is the Time Setting on a Motion Sensor?
The time setting on a motion sensor is the adjustable duration the light remains illuminated after triggering; it works with Sensor Sensitivity and LUX settings, allowing customization from seconds to several minutes security or convenience


