As an Amazon Associate, we earn from qualifying purchases. Some links on this site are affiliate links at no extra cost to you. Our recommendations are based on thorough research and editorial judgment.
Spacing LED Path Lights for Smooth, Continuous Illumination
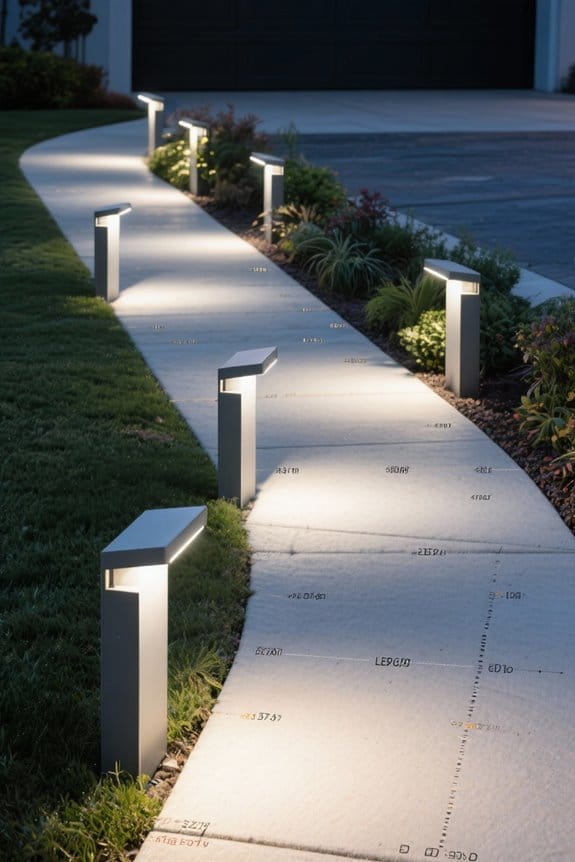
1) Purpose: Path lighting reduces trips and improves security, use 200–600 lumen LEDs per fixture, spaced 5–10 ft apart depending on beam angle and path width. 2) Narrow paths under 3 ft: use 12–18 in fixtures, 5–6 ft spacing, 200–400 lumens. 3) Wider paths over 5 ft: use 18–24 in fixtures, 8–10 ft spacing, 400–600 lumens. 4) For uneven or high-traffic routes reduce spacing to 6 ft. Continue for layout, beam overlap, wiring details, more.
Key Takeaways
- Space path lights 5–10 feet apart for continuous illumination, using closer spacing for higher-traffic or uneven routes.
- For narrow paths under 3 feet, space fixtures 5–6 feet apart to eliminate dark spots.
- Use fixtures producing roughly 200–600 lumens each for smooth low-level lighting without glare.
- Choose beam angles: narrow beams need ~5-foot spacing, wide beams (up to 120°) allow 8–10-foot spacing with overlap.
- Mount staggered fixtures on both sides (12–18″ tall for narrow, 18–24″ for wide paths) and size transformer above total wattage.
Why Path Lighting Matters
1. Path lighting importance is primarily functional, providing controlled illumination to reduce risk of trips, falls, and concealment, and supporting home security through improved recognition of approaching individuals or objects. 2. Implementation considerations describe lumen targets, mounting heights, beam angles, and fixture types, which guarantee consistency and a continuous glow without glare; use 100–300 lumens per fixture for low-level lighting, mount fixtures 6–12 inches above ground, and select narrow beam angles for directional control. 3. Aesthetic and design guidance emphasizes atmosphere and aesthetic appeal within landscape design, integrating fixture finish, color temperature, and spacing patterns to produce a cohesive, spaced arrangement that balances safety and visual comfort. Solar-powered pathway lights with IP65 waterproof rating ensure durability against adverse weather conditions, making them suitable for year-round use. Recommended practices improve consistency and reassure users about durable, maintainable installations and predictable visual outcomes for residences.
Recommended Spacing Guidelines for LED Path Lights
One critical consideration for LED path lighting is spacing, which directly affects coverage, uniformity, glare control, and pedestrian safety along walkways. 1. General guideline: Space path lights 5 to 10 feet apart to illuminate pathways continuously, this range balances fixture output and beam overlap for consistent lighting. 2. Narrow walks: For paths under 3 feet, place fixtures closer together, target 5 to 6 feet spacing to reduce dark spots and maintain even illuminance. 3. Wide walks: Wider paths over 5 feet may allow spacing up to 10 feet, especially when taller fixtures provide broader beam spreads and higher mounting elevations. 4. Brightness and layout: Softer LEDs need closer spacing, stagger fixtures on both sides for aesthetic balance and improved uniformity in outdoor lighting effectively. Solar pathway lights with efficient monocrystalline panels can provide optimal solar conversion, ensuring long-lasting and effective illumination for outdoor spaces.
Recommended Products

𝐇𝐞𝐚𝐯𝐲-𝐃𝐮𝐭𝐲 𝐒𝐨𝐥𝐢𝐝 𝐁𝐫𝐚𝐬𝐬: Gardenreet premium pathway light is built to last. Completely rust-resistant for salty or humid climates, it outperforms aluminum by over 10x. Achieve a designer landscape effortlessly — Once you install, lifelong you use

𝐒𝐨𝐥𝐢𝐝 𝐁𝐫𝐚𝐬𝐬 & 𝐀𝐥𝐥-𝐖𝐞𝐚𝐭𝐡𝐞𝐫 𝐑𝐞𝐚𝐝𝐲: Premium solid brass construction ensures no rust or fading over time. IP65 waterproof and engineered to withstand -40°F to 104°F. Keeps your garden beautifully illuminated through heavy rain, snow, or intense sun

𝐒𝐨𝐥𝐢𝐝 𝐁𝐫𝐚𝐬𝐬 𝐂𝐨𝐧𝐬𝐭𝐫𝐮𝐜𝐭𝐢𝐨𝐧: Made from sturdy brass, well constructed mushroom-top low voltage pathway lights. Resistant to rust and corrosion. The premium brass landscape lighting blends into your landscape. Once you install, lifelong you use, and saves on repair
Adjusting Spacing by Path Width and Use
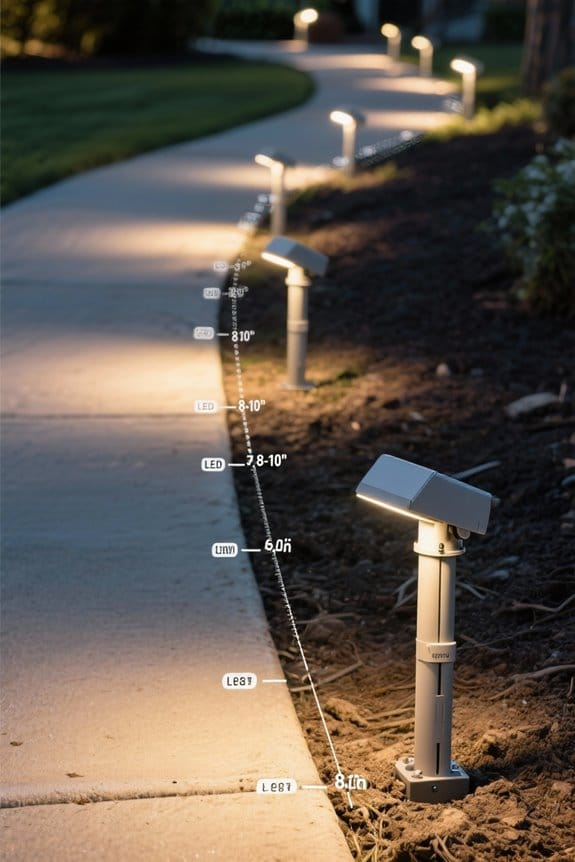
When applying the general spacing guidance for LED path lights, practitioners must refine layouts based on path width, pedestrian use, lumen output, beam spread, and mounting height. 1. Narrow paths: For paths under 3 feet wide, space fixtures 5–6 feet apart to prevent dark gaps and preserve continuous illumination, enhancing safety for pedestrian navigation on uneven surfaces. 2. Wider paths: For paths over 5 feet, spacing of 7–10 feet is acceptable, particularly with taller fixtures and broader beams, producing soft ambient lighting pools while maintaining effective illumination across the travelway. 3. Use cases: Reduce spacing to about 6 feet for high-traffic or uneven routes, allow up to 10 feet for decorative applications, adjust for LED lights brightness. Confirm layouts with a light meter. Consider using battery-powered lights with motion detection for added security and energy efficiency, especially in areas where wiring is not feasible.
Recommended Products
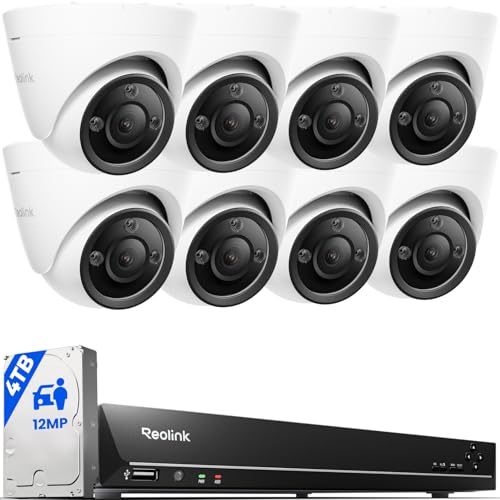
INCREDIBLE 12MP UHD IMAGE -- Mind-blowing 12MP PoE security camera system becomes affordable for your home and business security. Subtle details are recorded to ensure your peace of mind.
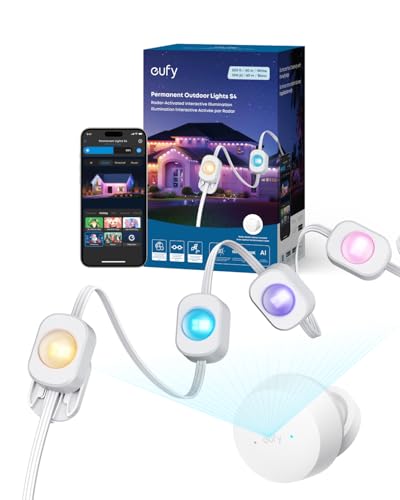
3-in-1 Lighting for Daily, Holiday, and Security: With 120°, 12 m radar coverage, this smart light strip offers precise motion detection for automatic lighting effects that follow your movement. Set customizable security alerts with flashing warnings to deter intruders.

Super Bright Solar Street Light: This 8000W solar street lights outdoor waterproof is equipped with 1080 high-efficiency 5730 SMD LED beads, delivering an impressive of ultra-bright illumination. With a long lifespan and minimal light decay, it provides reliable lighting for large outdoor areas, covering up to 3600 square feet.
Lumen Output and Beam Angle Considerations
In and around pathways, designers must balance lumen output, beam angle, mounting height, and spacing to produce continuous, glare-controlled illumination that meets functional and safety requirements for pedestrians. 1. Lumen output recommendations: Specify LED path lights between 200 and 1,000 lumens, aiming for brighter outputs of 400–600 lumens for most paths, to achieve the desired brightness and reduce fixture count, designers should calculate expected candela and lumen distribution. 2. Beam angle and spacing: Wider beam spreads up to 120 degrees permit spacing of 8–10 feet, while lower beam angle fixtures require spacing closer to 5 feet to avoid dark spots. 3. Practical overlap guidance: Guarantee beam overlap of adjacent fixtures to maintain consistent illumination and minimize glare. Conduct on-site photometry and adjust spacing accordingly. Many outdoor lights, such as weatherproof outdoor lights, are designed to withstand harsh conditions, ensuring reliable year-round use without compromising performance.
Continuous Illumination vs. Pools of Light
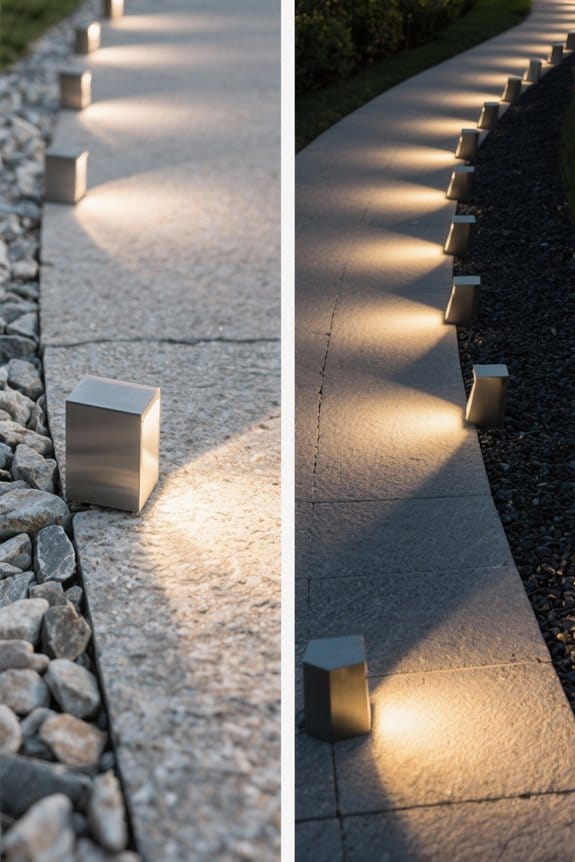
1. Continuous illumination: When pathway lights are positioned 5 to 8 feet apart, they create an unbroken line of light that reduces dark spots and improves safety on uneven, heavily trafficked paths, designers should specify fixtures brightness high enough to maintain uniform lux levels, and overlap beam spreads to guarantee consistency, this approach suits outdoor lighting entryways and paths where shadows must be minimized. 2. Pools of light: Spacing fixtures 6 to 10 feet apart produces distinct illuminated areas useful for highlighting landscape features and creating ambiance, this technique can rely on ambient light and lower fixtures brightness, it does not require beam overlap between fixtures, designers should plan lighting design around focal points and walking patterns to balance aesthetics and functionality with practical examples. Additionally, choosing low voltage lights can enhance energy efficiency and reduce electricity costs while providing effective illumination for both continuous and pooled lighting designs.
Fixture Height, Size, and Mounting Best Practices
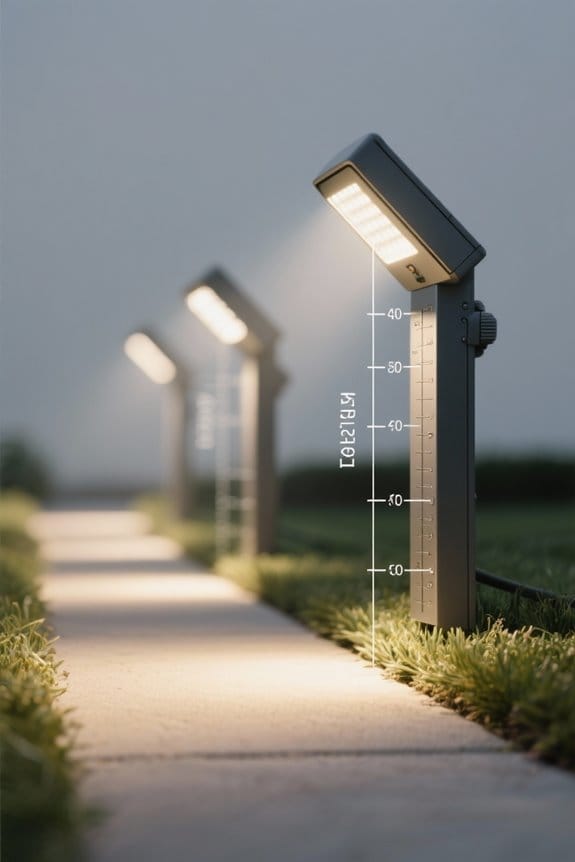
Many landscape lighting professionals specify exact fixture heights and sizes to ascertain uniform downward illumination, minimize glare, and meet safety targets for pedestrian routes within residential and commercial sites. 1. Fixture height guidelines: Use 12–24 inches for path fixtures, 12–18 inches on narrow walkways, 18–24 inches for wider paths, this guarantees ideal illumination and consistent brightness when spaced 5–10 feet apart. 2. Size and beam spread: Select larger fixtures for wider beam spread, calculate spacing to avoid dark spots, taller fixtures may be spaced further apart with care. 3. Mounting best practices: Stagger lights on either side, mount 6–8 feet for entryways or steps to raise angle, follow precise placement for safety. 4. Verification: measure illuminance, adjust spacing and height to achieve smooth, continuous coverage. For outdoor applications, ensure durable materials are used, such as aluminum or polycarbonate, to withstand varying weather conditions.
Recommended Products

Up to 3000 lumens of bright LED illumination. Selectable wattage allows you to select from 12W / 16W / 22W. Switchable CCT allows you to select from 3000K / 4000K / 5000K.

15-PACK OF SOLID BRASS PATH LIGHTS - The popular Conehead Path Light is constructed of solid brass for durability and beauty. It projects a 12-foot diameter region of illumination. Featuring pro-grade internal components with a high-temperature Beryllium copper socket. Silicone plug where the 4-foot lead wire exits the fixture, preventing moisture intrusion through the stem. Measures 25 inches tall, with a 7-inch diameter hat.

15-PACK OF SOLID BRASS PATH LIGHTS - The popular Flat Hat Path Light is constructed of solid cast brass for durability and beauty. It projects a 12-foot diameter region of illumination. Featuring pro-grade internal components with a high-temperature Beryllium copper socket. Silicone plug where the 4-foot lead wire exits the fixture, preventing moisture intrusion through the stem. Measures 24 inches tall with the 7-inch diameter hat attached.
Spacing for Complementary Outdoor Light Types
Section 1 Overview: Spacing for complementary fixtures builds on fixture height and mounting guidance, coordinating path, step, and area lights to produce uniform illumination. 1. General rule: lights should be spaced 5 to 10 feet apart along walkways, adjusted by lumen output and beam spread, overlapping pools of light deliver a uniform wash when aiming and height are calibrated. 2. Application details: for soft glow effects choose closer spacing and lower lumen fixtures, for ambient lighting for outdoor plazas use wider spacing and higher output units to maintain consistent illumination. 3. Design guidance: narrow paths require closer spacing to avoid dark gaps, stagger fixtures to enhance visual appeal while preserving overlapping pools of light for smooth continuity. Installers should verify spacing with field tests. Low voltage LED lights are energy-efficient designs that save up to 80% in energy costs compared to traditional bulbs, making them an excellent choice for sustainable outdoor lighting solutions.
Recommended Products
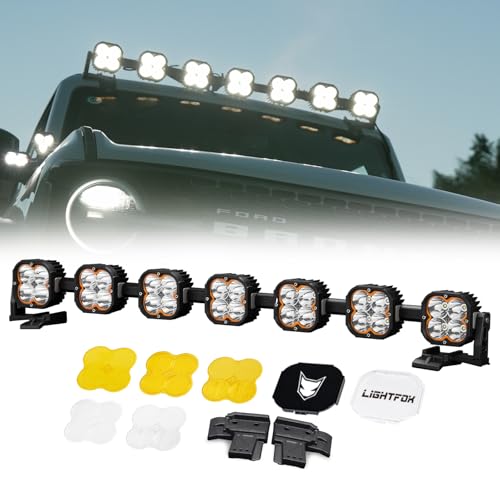
【Quick Install, Strong Structure】: The modular link-up system effortlessly connects 7 Cygnus 5" pod lights, offering exceptional rigidity and enhancing your Ford Bronco’s bold profile. With the system arriving pre-assembled, installation is made simple—just mount it on your roof using the straightforward instructions provided, and you’re all set.
PROFESSIONAL GRADE - Solid cast brass construction, with no powder coating or paint to wear off or peel. Fully adjustable glare guard and knuckle. Beryllium copper socket, which is more corrosion resistant than copper. Socket and machine threaded body are pre-greased for smooth operation and moisture protection. Includes a 4-foot 16G, SPT-2 premium tinned copper lead wire.

COMPLETE LANDSCAPE LIGHTING KIT - Includes six (6) solid brass spotlights, four (4) solid brass path lights, ten (10) easy-install 10-inch Hammer Stakes, one (1) 150-watt low voltage transformer, one (1) mechanical timer, six (6) 5W RGBCW LED MR16 bulbs, four (4) 3.5W RGBCW G4 LED Bi-Pin bulbs, two (2) Pro Junction Hubs, one (1) conduit, one (1) RF remote control and 100 feet of direct burial cable. Everything needed for a professional color-changing outdoor lighting system!
Installation Safety, Wiring, and Transformer Tips
Several critical safety and wiring procedures should be followed before any work begins, including full power shutdown, proper conductor selection, and verified transformer capacity. 1. Power and safety: Always turn off the main breaker, verify absence of voltage with a tester, wear insulated tools, and document installation safety steps for inspection. 2. Wiring and voltage: Use outdoor-rated wire sized to distance and load to minimize voltage drops, for example 12 AWG for runs under 50 feet at typical LED lights loads, 10 AWG for longer runs, follow manufacturer’s guidelines for conductor selection and routing. 3. Transformer and connections: Select a transformer rated above total wattage, employ waterproof connectors and enclosures to improve durability, routinely test for dark spots and correct output, and label circuits. Modern garden lights, such as the Gardencoin LED Pathway Light, offer long lifespans exceeding 30,000 hours and customizable lighting options to enhance outdoor aesthetics and safety.
How to Plan Your Layout and Calculate Fixture Count
To plan pathway lighting, measure the total path length and select desired spacing, using the formula: Number of lights ≈ path length ÷ desired spacing, which yields fixtures needed for consistent coverage. Use spacing LED path lights 5 to 8 feet apart for continuous illumination, adjust closer on narrow paths under 3 feet and wider on paths over 5 feet, ensuring illumination without dark spots. Consider bright fixtures and lumen output, as higher lumens permit wider spacing while maintaining overlap, calculate based on lumen distribution and beam angle. Stagger lights on either side, extend first and last fixtures beyond ends, and verify placement for even light across path width. Recalculate if obstacles or landscaping alter effective spacing and coverage consistently. Solar-powered LED path lights offer energy savings and eco-friendly lighting solutions, making them an excellent choice for outdoor illumination while reducing reliance on traditional power sources.
Recommended Products

𝐒𝐨𝐥𝐢𝐝 𝐁𝐫𝐚𝐬𝐬 𝐂𝐨𝐧𝐬𝐭𝐫𝐮𝐜𝐭𝐢𝐨𝐧: Made from sturdy brass, well constructed mushroom-top low voltage pathway lights. Resistant to rust and corrosion. The premium brass landscape lighting blends into your landscape. Once you install, lifelong you use, and saves on repair

Stunning Design - 12-pack savings - The Lumengy Paver Lane series has a super slim 0.5x9 (0.55 x 8.85 inches) size, perfect for a thin linear highlight between pavers. Its design adds sophistication and elegance to your outdoor space, while the warm white 2700K glare-free ambient effect provide safety and comfort.

Elaborate RGBIC Lighting: With an upgraded LED design, Govee Permanent Outdoor Lights 2 shows smooth and uniform lighting effects chosen from 16 million accurate color options including 40lm white light, enhancing daily aesthetics and security.
Frequently Asked Questions
How Far Apart Should Pathway Lights Be Spaced?
For safety and for ambiance, designers recommend spacing pathway lights 5–10ft apart; pathway-illumination-tips, ideal-lighting-distance, decorative-feature-placement, outdoor-lighting-aesthetics, lighting-design-considerations, safety-and-visibility, light-intensity-recommendations, budget-friendly-options, energy-efficiency-methods, seasonal-lighting-adjustments. They balance safety, aesthetics, cost and efficiency across seasons using practical scalable solutions.
How Far Apart Should LED Lights Be Spaced?
They recommend spacing LEDs about 5 to 10 feet apart; illumination distance balances light visibility on garden pathways, complements outdoor aesthetics, considers lighting intensity, safety considerations, seasonal adjustments, installation tips, energy efficiency and design styles.
Should You Stagger Pathway Lights?
Yes; pathway light designs favor staggered arrangement benefits to boost illumination effectiveness and lighting uniformity, enhancing safety enhancements, aesthetic appeal and landscape contrast while improving energy efficiency, installation techniques and outdoor ambiance for user navigation.
Should Pathway Lights Be on One Side or Both?
Both sides are recommended; they enhance path illumination and landscape design, improve ambient lighting and outdoor aesthetics, support safety measures, allow decorative options, consider light temperature, energy efficiency, installation tips, and seven side lighting balance


