As an Amazon Associate, we earn from qualifying purchases. Some links on this site are affiliate links at no extra cost to you. Our recommendations are based on thorough research and editorial judgment.

Creating a Visitor‑Friendly Path From Curb to Front Door
1) Purpose: A visitor path guides approach, boosts curb appeal, and aids wayfinding, recommend 1.2–1.5 m primary width, 0.9–1.0 m secondary width, and maximum running slope 1:12 for accessibility. 2) Layout: Straight routes provide sightlines, curved routes integrate planting and focal elements, steps introduce 300–400 mm risers with non‑slip treads. 3) Materials: Match architecture, use 4 in concrete or compacted aggregate base, guarantee drainage and 150–300 lux lighting. Additional construction, maintenance, and planting guidance follows.
Key Takeaways
- Provide a clear, appropriately wide path (1.2–1.5 m primary, 0.9–1.0 m secondary) for comfortable two‑way pedestrian flow.
- Choose a layout (straight for formal, curved for relaxed) that complements landscaping and sightlines to the front door.
- Select durable, slip‑resistant materials that match the house style and meet minimum thickness and frost‑resistance requirements.
- Install evenly spaced pathway lighting (150–300 lux; 18–36 inches from edge) and non‑slip surfaces for night safety and wayfinding.
- Ensure accessibility with max 1:12 slopes, gentle steps or ramps, continuous handrails, and routine maintenance to keep the route clear.
Why a Welcoming Walkway Matters
Because the primary walkway establishes the visitor’s approach, designers should treat it as a calibrated architectural element, integrating form, function, and wayfinding to influence perception and movement. 1. Purpose and perception: A welcoming walkway increases curb appeal, creates a path that clearly directs from curb to front walkway threshold, and signals entry hierarchy; recommended width 1.2–1.5 m for two-way circulation, 0.9–1.0 m for single users, and 300–400 mm riser limits where steps occur. 2. Safety and clarity: Incorporate 150–300 lux path lighting, contrasting edge materials for visual interest, tactile surfaces for slip resistance, and continuous sightlines to the door. 3. Integration: Align materials and planting to connect outdoor and indoor spaces, reinforcing style and maintenance expectations. Follow maintenance schedules to preserve functionality and appearance. Consider incorporating solar-powered lights to provide an eco-friendly and efficient solution for illuminating the walkway, enhancing both safety and aesthetic appeal.
Planning the Path: Straight, Curved, or Stepped

- Section 1: Route selection explains primary options and their effects in walkway design; straight paths offer efficient, formal routes emphasizing grandeur and clear guidance for visitors, they require alignment and sightlines to the entrance.
- Section 2: Curvature considerations address curved paths, which permit a more relaxed approach and meandering experience, they work well with landscaping and soften visual impact.
- Section 3: Grade and steps cover stepped pathways for elevation changes, they add visual interest and must include consistent riser heights, secure handrails, and non-slip treads.
- Section 4: Dimensions and accessibility specify primary paths at least 48 inches wide, turning radii, slope limits, and clearances to maintain a visitor-friendly approach.
- Section 5: Implementation gives layout testing and sightline verification. Recommendations. Motion sensor bollard lights, with weatherproof rating like IP65, can enhance these pathways by providing reliable lighting and ensuring safety during nighttime.
Choosing Materials That Fit Your Home’s Style

Materials selection provides the foundational link between a home’s architectural language and the walkway’s performance, guiding choices such as brick or pavers for traditional facades, cast or broom-finished concrete and metal edging for contemporary compositions, natural stone for rustic or classic settings, and porcelain tiles for sleek modern entrances, while also accounting for practical criteria including minimum walkway width (48 inches), material thickness (concrete slabs typically 4 inches minimum, pavers 2–3 inches compacted), frost resistance, slip rating, and expected maintenance intervals. 1. Material choice: select stone pavers or porcelain tiles to match architecture, integrate gravel or mulch where budget dictates, and plan a cohesive walkway set for smooth front porch changes. 2. Durability: specify required thickness, frost protection, slip rating, and regular maintenance schedule. Consider motion sensor lights for illuminating pathways, ensuring energy-saving and hands-free operation while enhancing safety and aesthetics.
Recommended Products
BLADE DETAILS: Blade guard easily opens and secures with finger knob. Blade splash guard and back splash tray keeps work area dry and returns water to water tray.

Transform Any Space with Natural Slate Deck Tiles - Upgrade your home with 3rd Street Inn Slate Stone Interlocking Deck Tiles, designed to create a clean, modern surface for both indoor and outdoor spaces. Made from 100% natural slate stone, these tiles help protect against moisture, sun exposure, and everyday wear, making them a reliable flooring solution for any environment.

Save 6 inches of needless excavation Save 6 inches of crushed stone Save the cost of truck and driver on the road Save on costly dumping fees Save wear and tear on machinery Save on labor costs Save overall installation time Increase profit For pedestrian use only
Getting Width, Slope, and Drainage Right

1. Section 1: Width specifications: The primary walkway should provide a minimum clear width of 48 inches, while secondary paths require at least 36 inches to allow comfortable two-way or single-file passage, and ADA compliance requires a clear width of 36 inches with designated passing spaces along longer routes. 2. Slope considerations: Gradual slopes are recommended, maintain a maximum running slope of 1:12 for accessible access to avoid steep pitches, and shorter ramps can use the same ratio with landings. 3. Drainage and surface: Grade pathways slightly away from the house at a minimum of 2 percent to prevent pooling, use non-slip surfaces on slopes, and guarantee subsurface drainage to protect the foundation. Recommend periodic inspection and maintenance to regularly preserve function and safety.
Designing for Accessibility and Safety

1) General principles: Maintain 48-inch primary and 36-inch secondary clear widths, a 1:12 maximum running slope, and two percent drainage, to support accessible, safe circulation. 1. Clear widths: The primary walkway should be 48 inches minimum to permit wheelchairs and mobility devices, secondary paths 36 inches for single-file movement, clear of obstructions and vegetation. 2. Surface and slope: Specify non-slip treads on steps and ramps, use firm, stable surfaces, maintain maximum running slope of 1:12, and two percent cross-slope for drainage. 3. Alignment and aids: Employ gentle curves avoiding sharp turns, provide continuous handrails where grade changes occur, and integrate low-profile landscape lighting to promote visibility, accessibility, and safety along the route. Maintain clear signage and color-contrast edges for wayfinding and fall prevention regularly. For enhanced visibility and security, consider installing motion detector lights with a high lumen output to illuminate pathways efficiently.
Recommended Products
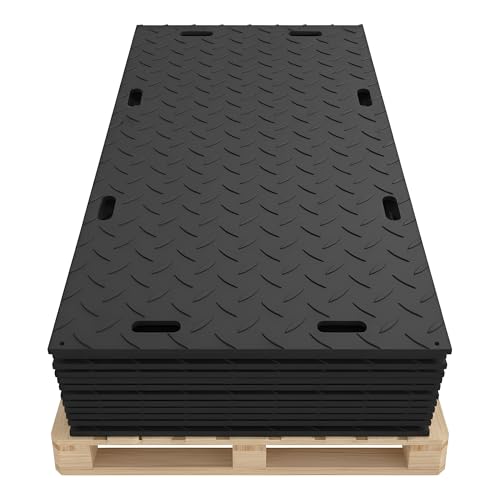
Dimensions: Width x Length: 4 Feet x 8 Feet | 20 Pcs Pack | Thickness: ½ Inch | Weight: 83.6 Lbs (38 KG) | Material: HDPE | Load Capacity: 60 Tons

2024 New Upgrade: The latest research and development of new upgraded snow melting mats in 2024. 1. Thickened and weighted, the weight of the snow melting mat of the same size is increased by 26%, and more materials are used to improve the service life and wear resistance of the product. 2. Convex willow leaf + W texture, more outstanding anti-slip performance. 3. Newly designed line connection interface, with more security.

Vestil AWR-38-8A Aluminum Wheel Walk Ramp Overlapping Style 96 in. x 38 in. 2500 Lb. Capacity Silver
100% Welded aluminum construction is light-weight and will not rust
Lighting Strategies to Guide Guests After Dark
- Lighting strategies should prioritize consistent spacing, measured at 18–36 inches from path edge, to guide visitors while maintaining a welcoming atmosphere and safety.
- Low-profile path lights offer 300–500 lumens, mounted 6–12 inches above grade, illuminating tread and edges to reduce glare and define route.
- Motion-sensor lights, positioned 8–12 feet apart and angled 20–30 degrees toward approach, provide activation zones that conserve energy and enhance security.
- Uplighting fixtures, placed 3–6 feet from architectural elements with 10–20 degree beam spreads, add depth and visual cues without lighting plantings.
- Step lights recessed into risers, spaced per riser and providing 50–100 lux, guarantee safe elevation changes.
- Consistent placement yields a cohesive corridor from curb to door. Implement controls to balance timing effectively.
- For enhanced ambiance, consider smart lighting options like the Govee Smart UpDown Lights, which integrate with home systems and offer extensive color choices to suit various outdoor settings.
Recommended Products

ONE-HAND FEATHER TOUCH DISASSEMBLY: Easily disassemble the scooter with one hand for quick and convenient transportation. The heaviest piece is the front section, weighing at 54 lbs.

ONE-HAND FEATHER TOUCH DISASSEMBLY: Easily disassemble the scooter with one hand for quick and convenient transportation. The heaviest piece is the front section, weighing at 54 lbs.

INCREDIBLE 12MP UHD IMAGE -- Mind-blowing 12MP PoE security camera system becomes affordable for your home and business security. Subtle details are recorded to ensure your peace of mind.
Landscaping, Edging, and Planting Ideas
As exterior lighting establishes nocturnal wayfinding, landscape design and edging must be coordinated to reinforce route definition, control runoff, and provide seasonal visual interest. 1. Edging specification: Specify 4 to 6 inch mulch or 3 to 4 inch gravel borders, set on 2 to 3 inch base to prevent migration, defines walkway that leads to entrance and limits soil erosion. 2. Plant selection: Use drought resistant perennials spaced 12 to 24 inches on center, 3 inch mulch, plants in your yard examples: sedum and lavender to reduce maintenance and water demand in the outdoor space. 3. Mixed materials: Combine 12 by 12 inch pavers with 2 to 4 inch decorative stone infill, integrate solar lights at 8 to 10 foot intervals for safe navigation. Consider employing motion-activated lights with IP65-rated fixtures to enhance security and performance, especially in outdoor environments exposed to the elements.
Architectural Accents: Gates, Arbors, and Water Features
Architectural accents, when engineered and sited deliberately, establish hierarchy and legibility along an approach, reinforcing wayfinding while meeting structural and maintenance requirements. 1. Gates: Specify clear opening widths of 36–48 inches for pedestrian access, mount posts on 12–18 inch concrete footings, and select materials to match the facade, for example 4×4 timber or 2-inch steel tubing. 2. Arbors: Place arbors 6–10 feet from the curb to frame the threshold, set crossbeam height at 7.5–8 feet, and provide trellis spacing of 2–4 inches to support climbing plants. 3. Water features: Install small fountains with 12–24 inch basins, conceal pumps in accessible vaults, and maintain 1–2 inch overflow capacity. Strategic placement guides circulation, and details guarantee durability. Design tolerances permit 1/2-inch differential, and inspections occur annually, with records retained. For a more visitor-friendly path, consider installing motion-activated garden sensor lights to enhance visibility and security.
Recommended Products

ADVANCED DUAL JOYSTICK PILOT CONTROL: Features a professional-grade dual joystick pilot control system and a visual dashboard for intuitive, smooth, and precise operation. This advanced setup significantly reduces operator fatigue compared to traditional mechanical levers.

Color-changing stainless steel spillway contains long lasting, low energy LED lights that has 8 different color settings, slow and fast speeds, and 4 various light patterns.

Case includes 1200 units-24 packs of 50 heavy duty zip ties black
Affordable Options and DIY Approaches
Although budget constraints often dictate material selection, clear technical choices and simple techniques can produce durable, attractive walkways with minimal cost and maintenance, using measured depths, appropriate aggregates, and straightforward installation sequences. 1. Base preparation: excavate 4–6 inches, compact subgrade, install 3–4 inches of crushed stone as a structural base, then 1–2 inches of sand bedding for stability. 2. Surface options: install gravel or mulch as budget-friendly surfaces, or place stepping stones set into mortar-free sand beds at 18–24 inch centers for stride. 3. Layered hardscape: use affordable limestone or granite flagstones on a compacted aggregate base for durability and visual interest. 4. Planting and ecology: edge paths with native plants, reduce runoff, and lower maintenance. Temporary routes may use sand or dirt. Additionally, incorporating solar-powered outdoor lights can enhance both the ambiance and security of your walkway without increasing operational costs.
Recommended Products

DURABLE AND ECO-FRIENDLY: Crafted from 100% recycled PPE plastic, our gravel paver system delivers exceptional strength and longevity; This set includes 11464 units with a 1-inch depth, covering an area of 4350 square feet

A Monster-level Engine: With our high-performance plate compactor, you'll have the power you need to get the job done. Its 196 cc / 6.5 HP gasoline engine delivers a whopping 5,600 vibrations per minute, while the 12-inch compaction depth ensures optimal results.

ARCHITECTURAL TALL RECTANGULAR PLANTER FOR REFINED SPACES: Designed with a modern architectural silhouette, this tall rectangular planter brings a clean, elevated aesthetic to patios, entryways, balconies, terraces, and interior spaces. A sculptural foundation for greenery that enhances both residential and commercial environments.
Routine Maintenance to Keep the Path Attractive
- Inspection and cleaning: A property manager should perform routine maintenance inspections weekly, removing weeds and debris by hand or with a blower, ensuring a 36-inch clear walking width and preventing trip hazards. Trim overhanging branches and edge grass monthly during the growing season to maintain clear visibility, reducing sightline obstructions to 0.5 meters above grade.
- Surface preservation and repair: Apply sealant to stone or brick every one to three years to limit moisture ingress and UV degradation, follow manufacturer coverage rates, typically 0.1–0.3 liters per square meter. Repair cracks and reset loose pavers immediately to prevent propagation.
- Plantings and aesthetics: Install seasonal plantings refreshed twice yearly, using low-maintenance species and 15–30 cm mulch layers. Record actions with dates and photographic evidence. Consider incorporating solar stake systems to enhance both the aesthetics and nighttime safety of your pathway.
Frequently Asked Questions
How to Create a Welcoming Front Entrance?
Like a warm lantern, they create a welcoming front entrance with front porch decor, inviting lighting, seasonal plants, and welcome mats; add clear walkway, seating, focal accents, safe, accessible paving to guarantee charm and functionality.
What Is the Cheapest Way to Make a Path?
The cheapest way is using a gravel path or mulch walkway, supplemented by inexpensive stepping stones or reclaimed pavers; grass pavers can be used for stability, edging with timber keeps costs down and defines route.
How to Add Curb Appeal to Front Door?
Homeowners boost front‑door curb appeal by choosing bold color contrast, upgrading door hardware, adding seasonal decor, installing attractive lighting options, framing the entrance with plants and surfaces, and maintaining cleanliness for a welcoming, eye‑catching entry.
How to Make a Front Yard Pathway?
The homeowner should use durable pathway materials like pavers, gravel or stone, select design patterns (straight or winding), install subtle lighting options for safety, apply edging techniques for definition, guarantee width, non‑slip surfaces and maintenance.


