As an Amazon Associate, we earn from qualifying purchases. Some links on this site are affiliate links at no extra cost to you. Our recommendations are based on thorough research and editorial judgment.
Driveway Lighting Layouts That Balance Safety and Glare
1. Assessment: Measure driveway length and width, note gradients and obstacles, plan sightlines and fixture spacing at 10–15 ft. 2. Placement: mount shielded fixtures 24–36 inches high, aim downward to reduce glare. 3. Systems: select solar with 6–8 hours sun or low‑voltage 12–24 V or hardwired for lumen output, specify IP65, 3000–4000K LEDs, space fixtures to maintain uniform illumination and contrast under 3:1, add photocells, motion sensors and seasonal maintenance for operation; layout examples follow.
Key Takeaways
- Mount shielded fixtures 24–36 inches high and aim downward to illuminate the path while minimizing direct glare.
- Space fixtures 10–15 feet apart for even illumination and to avoid bright/dark glare contrasts along the driveway.
- Limit contrast ratios to about 3:1 between task and ambient lighting to preserve visual comfort and visibility.
- Use motion sensors, dimming profiles, and photocells to reduce brightness when not needed and improve nighttime comfort.
- Choose LED fixtures with appropriate beam angles, shielded optics, and IP65-rated housings for durable, glare-controlled performance.
Importance of Proper Driveway Lighting
1. Proper driveway lighting is foundational for safety, providing consistent illumination that can enhance safety by improving visibility up to 100 feet for drivers and pedestrians, and reducing trip and falls risks by up to 80%. Section 1: Objectives—define lighting solutions that balance lumen output, beam angle, and mounting height to minimize glare while maximizing sightlines. Section 2: Technical guidance—specify 200–400 lumens per path luminaire, 30–60° beam angles, and 18–36 inch bollard heights for pedestrian zones, retaining lower glare, and preserving property security through the elimination of dark spots. Section 3: Strategic placement—position fixtures to avoid direct line-of-sight into drivers’ eyes, provide overlapping pools of light, and guarantee maintenance access for long-term performance. Implement controls such as timers and dimming for adaptive, energy-efficient operation. Reliability. Many models, like those with automatic on/off functionality, simplify usage and enhance energy efficiency by ensuring lights operate only when needed.
Assessing Your Driveway Size, Shape and Hazards
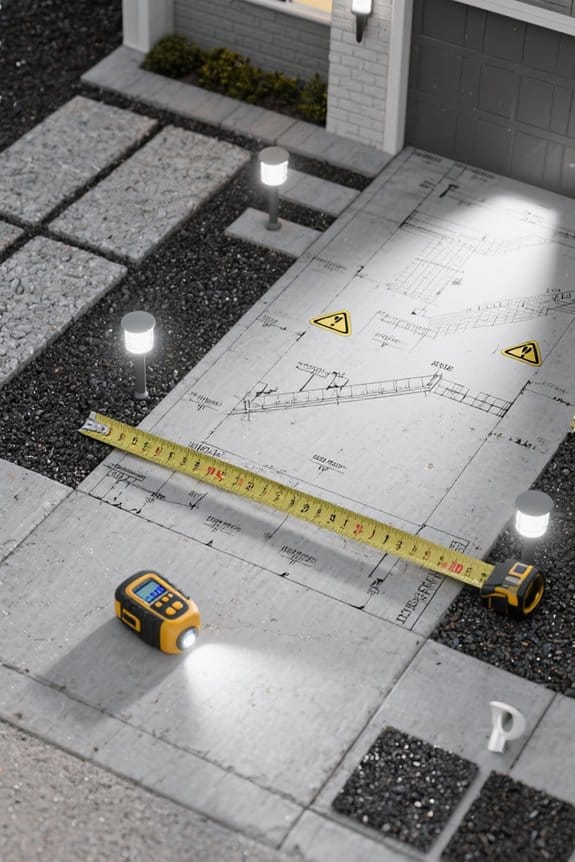
How should an accurate evaluation of driveway size, shape, and hazards guide the lighting plan; Section 1: Measure and map—record overall length and usable width in feet, note gradients, identify curves and branches, and mark fixed obstacles such as trees, walls, and drainage features to determine fixture count and sightline requirements. 1) Evaluating dimensions: Measure driveway size, calculate fixture spacing every 10 to 15 feet on long drives, adjust spacing around curves, and determine illumination levels to maintain safety and reduce dark spots. 2) Identify hazards: Locate obstacles and uneven surfaces, plan lighting placement to make hazards visible, orient fixtures downward and set height and angle to minimize glare. 3) Implementation: Use recessed or spot fixtures for curves, document placements on a scaled plan. Consider using dusk-to-dawn sensors for energy efficiency and consistent nighttime illumination.
Recommended Products

DEKOR EZ Yard Dot LED Light Kit for Pathways, Landscape, Hardscape, Low Voltage Lighting (Light Kit)
Durable Construction - EZ Yard Dots are built tough and will not rust. The transparent polycarbonate cover will not yellow with age.

【Grated Solid Brass Top & 360° Anti-Glare Illumination】Crafted with heavy-duty solid brass top and reinforced nylon bottom, this fixture outperforms aluminum/plastic alternatives with military-grade corrosion resistance. The precision cut brass grille prevents glare and eliminates harsh light while maintaining 360° illumination, eliminating eyestrain on walkways/driveways. Reinforced 3mm thick grille withstands 200 lbs. of mower impact
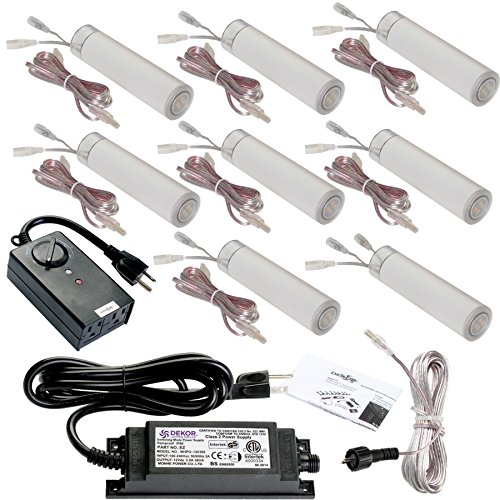
RECESSED PAVER DOT DRIVEWAY & PATHWAY LIGHTS - This low voltage paver light kit lights driveways, walkways and pathways with tiny recessed LED lights set into concrete, stone and pavers.
Choosing Power Sources: Solar, Low‑Voltage and Hardwired
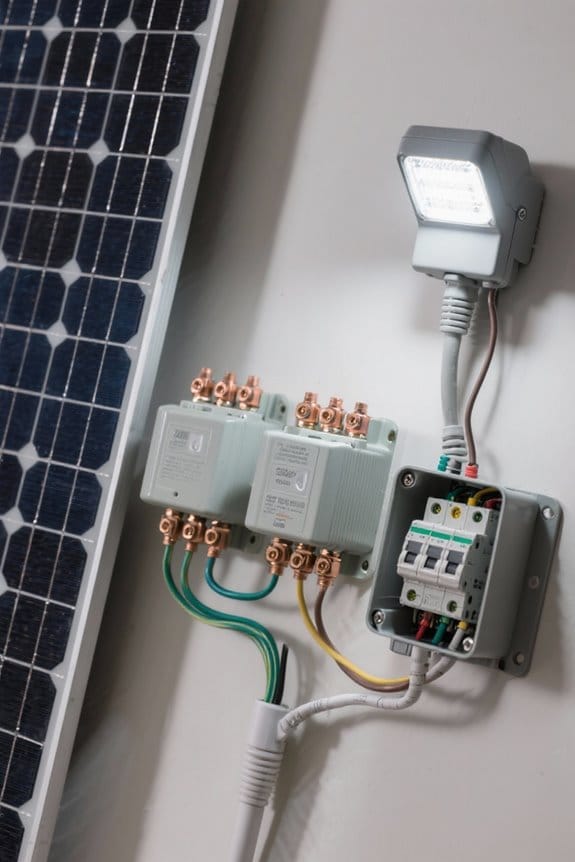
1) Overview: The choice between solar, low‑voltage (12–24 V) and hardwired systems dictates fixture placement, energy budgeting, maintenance cycles, and safety compliance for driveway lighting. 1. Power source options: Solar lights require 6–8 hours direct sun for charge, batteries typically last 2–4 years, LED options maximize energy efficiency and reduce run time. 2. Low-voltage lighting: Low-voltage lighting uses 12–24 V transformers, permits spaced fixtures at 6–12 foot intervals, is safer for home installation, and lowers current. 3. Hardwired lighting: Hardwired lighting provides consistent lumen output, demands licensed, complies with electrical codes, and is preferred for high-traffic driveways. 4. Maintenance needs: Compare battery swaps, cleaning panels, wiring inspections, and periodic fixture replacement to match outdoor lighting goals and driveway lights. Plan budgets for long-term reliability. For solar-powered lights, an IP65 rating ensures weather resistance and durability against environmental conditions.
Recommended Products

𝐇𝐞𝐚𝐯𝐲-𝐃𝐮𝐭𝐲 𝐒𝐨𝐥𝐢𝐝 𝐁𝐫𝐚𝐬𝐬: Gardenreet premium pathway light is built to last. Completely rust-resistant for salty or humid climates, it outperforms aluminum by over 10x. Achieve a designer landscape effortlessly — Once you install, lifelong you use

𝐒𝐨𝐥𝐢𝐝 𝐁𝐫𝐚𝐬𝐬 𝐂𝐨𝐧𝐬𝐭𝐫𝐮𝐜𝐭𝐢𝐨𝐧: Made from sturdy brass, well constructed mushroom-top low voltage pathway lights. Resistant to rust and corrosion. The premium brass landscape lighting blends into your landscape. Once you install, lifelong you use, and saves on repair

Sturdy Solid Brass: The wired black solid brass pathway lights surpass other materials in corrosion resistance, rust resistance, and impact resilience, enduring for years. Sturdy and heavy duty. The antique bronze finish adds an extra layer of protection against oxidation and rust. It also adds an elegant touch to your yard, making it the envy of your neighbors. The sidelight melds with outdoor surroundings, offering a touch of luxury
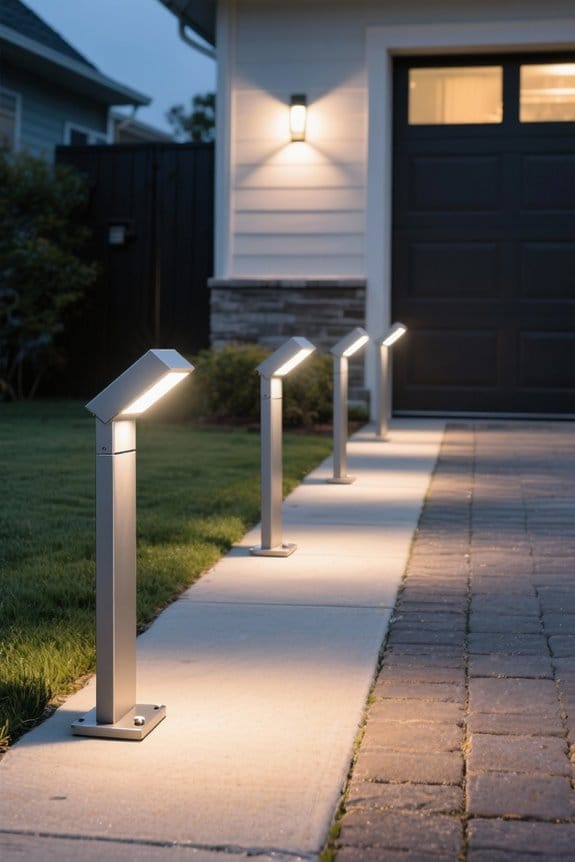
Light Placement Strategies to Minimize Glare
Position lights at a height of 24 to 36 inches, ensuring pathway surfaces receive illumination while minimizing direct glare into the eyes of drivers and pedestrians. 1. Height and aiming: Install shielded fixtures, angled to direct light downward, to reduce direct glare and concentrate light coverage on walking surfaces, use soft white LED lights (2700K–3000K) to limit harsh glare and improve safety and aesthetics. 2. Spacing and layout: Space driveway lights 10 to 15 feet apart, staggered if possible, to provide uniform illumination of pathways without creating bright spots. 3. Supplemental techniques: Integrate uplighting for trees and wall sconces to enhance depth without increasing pathway glare, select lighting fixtures with shields and low cut-off optics to preserve night sky. Implement photocells and dimming controls. Consider using IP65 rated lights for moderate water exposure, ensuring they remain functional over time.
Recommended Products

Stunning Design - 12-pack savings (Design Patent Pending) The Lumengy Paver Lane series has a super slim 0.5x8 (0.55 x 7.87 inches) size, perfect for a thin linear highlight between pavers. Its design adds sophistication and elegance to your outdoor space, while the glare-free effect and warm ambient light provide safety and comfort.

【Smart Photocell Enabled】✅ LED Parking Lot Light Commercial With dusk-to-dawn smart photocell sensor, can detect ambient light and be automatically turned on at dusk and off at dawn. No need to manually switch, saving your time, effort and bills. Its detachable design allows quick replacement of the sensor alone if needed, reducing maintenance costs while preserving the fixture.
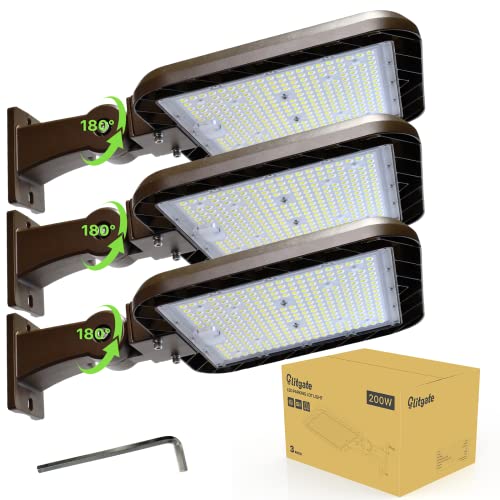
Brighter and more efficient. This 200w led shoebox light produces 30000lm of 5000k daylight brightness with a high efficacy of 150lm/w (800W HID/HPS Eqv.). Replacing your old sodium bulb with this bright shoebox light to get 85% saving in electricity. Full screen design ensures great coverage to light up your whole area
Fixture Types and Styles for Function and Curb Appeal
1. A driveway should employ varied fixture types for layered lighting, combining lampposts, path lights, and in-ground lights to support safety and navigation while enhancing curb appeal through coordinated styles. 2. Specify LED fixtures rated 3000–4000K for primary tasks, supplement with warm and cool lighting mixes to balance color temperature, reduce glare, and preserve ambiance; choose units with 50,000-hour lifespans for maintenance efficiency. 3. Integrate motion sensor lights on entrances and critical paths, set to 10–30 second dwell and 5–10 lux thresholds to improve response without nuisance. 4. Select stylish fixtures that match architectural design, for example vintage posts at the entrance and recessed in-ground uplights near façades, ensuring mounting heights and aiming angles comply with photometric goals. Maintain documentation for installation and maintenance. 5. Opt for energy-efficient options, like LED bulbs, to reduce electricity costs while maintaining brightness in your driveway lighting design.
Recommended Products

Dusk to Dawn Technology – Keep your home as efficient as possible, with dusk to dawn technology the animated flame bulb will immediately ignite when the sun starts to set

FITMENT | Fits 1999 - 2007 Chevrolet/GMC Silverado/Sierra 1500/2500HD/3500HD Classic Crew Cab Vehicles & Others

【Say goodbye to darkness and high electricity bills】Tired of dark driveways or expensive electric bills? This solar street light provides a powerful 25000W equivalent brightness using 0 electricity. Simply mount it outdoors, and it charges automatically during the day. You get a reliably lit property at night without increasing your monthly expenses or needing complex wiring, giving you peace of mind and instant savings.
Spacing Guidelines: Poles, Bollards and Path Lights
When laying out spacing for poles, bollards and path lights, designers should apply measurable spacing standards, photometric goals, and site-specific adjustments to avoid dark gaps or a “runway” appearance. 1. Path lights: Space path lights approximately 6 to 10 feet apart to illuminate walking surfaces evenly, minimize glare, and maintain balanced light distribution, using low-level lighting fixtures at ground grade. 2. Bollard lights: Install bollard lights on alternating sides at 10 to 15 feet intervals, set at 36 to 40 inches height to reduce direct glare while providing wayfinding illumination. 3. Poles and combination layouts: Use taller poles to supplement path lights, add fixtures at turns or obstacles, and adjust spacing based on photometric results to preserve safety and visual comfort. Follow manufacturer specifications. For outdoor lighting, consider using high waterproof ratings like IP65 or IP66 to ensure durability and weather resistance.
Layered Lighting Techniques for Safety and Atmosphere
Although layered lighting integrates ambient, task, and accent components to balance safety and atmosphere, designers must apply standards, photometric targets, and site-specific adjustments to accomplish glare-controlled outcomes. 1. Ambient lighting strategy: specify post or wall-mounted fixtures at 300–500 lux peak near drive entry, spaced 6–10 m apart to provide even illumination across driveways and pathways, mitigating shadows and improving safety. 2. Task lighting zoning: use path lighting at 0.5–1.5 m height with 5–10 lux on walking surfaces, illuminate steps and entrances with focused fixtures, guarantee proper placement to avoid direct beams into sightlines. 3. Accent use: deploy low-voltage accent lighting to highlight features, maintain contrast ratios under 3:1 to control glare and preserve visual interest while supporting overall layered lighting for predictable, safe outcomes. Incorporating energy-efficient designs in motion sensor lights can significantly reduce electricity consumption, contributing to more sustainable outdoor lighting solutions.
Smart Controls, Motion Sensors and Energy Savings
Because properly configured smart controls and motion sensors coordinate luminaires, schedules, and sensor thresholds, driveway systems achieve targeted illumination, reduced energy consumption, and enhanced security. 1. System design: specify motion sensors with 120° detection and 10 to 15 m range, integrate smart controls to customize settings for dusk to dawn schedules, and deploy LED lights rated 3000 to 4000 K to reduce glare while providing illumination. 2. Energy savings: combine occupancy-triggered motion sensors and dimming profiles to cut runtime by up to 80 percent, pair LED lights with energy-efficient designs to realize lifecycle savings approaching 90 percent versus incandescent bulbs. 3. Implementation: use networked lighting systems, set sensor thresholds at 10 to 20 lux, log events for security, and retain manual override for maintenance. Many battery-powered security lights are weatherproof, with ratings between IP65 to IPX6, ensuring reliability in various outdoor conditions.
Recommended Products

Powerful protection for any property — 1080p HD security camera for your home or business with motion-activated LED floodlights, 105dB security siren.

【End Power Outage Worries & Enjoy Continuous Illumination】: Featuring a powerful 55000mAh battery and 30% high-efficiency solar panel, this solar light outdoor stores ample energy during the day, ensuring reliable dusk-to-dawn lighting even on cloudy days. You gain consistent, worry-free outdoor security without rising electricity costs or wiring hassles.
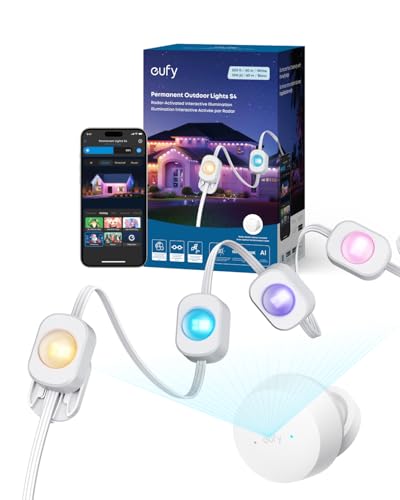
3-in-1 Lighting for Daily, Holiday, and Security: With 120°, 12 m radar coverage, this smart light strip offers precise motion detection for automatic lighting effects that follow your movement. Set customizable security alerts with flashing warnings to deter intruders.
Weather Resistance, Materials and IP Ratings
If driveway lighting is to perform reliably in outdoor environments, designers and installers must prioritize ingress protection, material selection, and sealing techniques to prevent moisture intrusion, particulate ingress, and corrosion that commonly degrade fixtures and electrical components. 1) Specification: select fixtures with an IP65 rating or higher, indicating dust-tight construction and water jets resistance, specify cable glands with IP68 where buried, and maintain 50 mm clearance from soil for vents. 2) Materials: use stainless steel (316 grade), anodized aluminum, or UV-stable polycarbonate for maximum durability, include corrosion-resistant coatings in coastal zones. 3) Electricals: guarantee drivers, connectors and junctions are weatherproofed, employ silicone seals and potting compounds. 4) Maintenance: schedule inspections, cleaning, and replacement to preserve aesthetic quality and function. Follow manufacturer torque specifications regularly. Many outdoor string lights come equipped with shatterproof materials that reduce the risk of breakage and extend the lifespan of lighting fixtures in harsh weather conditions.
Maintenance, Upgrades and Seasonal Checklists
- Regular maintenance begins with a scheduled, documented regular inspection every six months, examining fixtures for corrosion, loose wiring connections, cracked lenses, and bulb output degradation. Technicians should measure voltage at fixtures, expect 12–24 VDC for low-voltage systems, verify ground continuity below 5 ohms, and record lumen output. Choosing solar lights with high-performance solar panels can ensure longer runtimes and better efficiency in diverse weather conditions.
- Upgrades focus on energy-efficient retrofits, replacing incandescent or halogen bulbs with LED modules rated 30,000–50,000 hours, or installing solar lights with 20–40W panels and 3–6 Ah batteries for reliable night autonomy.
- Seasonal checklists include battery replacement in spring and fall, clearing debris from panels, testing motion sensors monthly, and performing weatherproofing on seals, thereby maintaining safety and operational longevity. Documentation of tasks and timelines supports warranty claims and informs future upgrades decisions, promptly implemented.
Frequently Asked Questions
What Is the Best Lighting for a Driveway?
The best driveway lighting combines LED options, solar lights and motion sensors for safety features, pairs decorative fixtures with correct lighting placement, balances brightness levels, maximizes energy efficiency and supports landscape integration for nighttime visibility.
How Do You Avoid Glare in Lighting?
Ridiculously simple, designer uses glare reduction techniques: proper lighting fixture placement, light temperature selection, dimming options, shielding methods, considers reflective surfaces impact and color contrast effects, applies adjustment strategies, task oriented lighting, energy efficient solutions.
What Is the Rule of Thumb for Outdoor Lighting?
Rule: space outdoor lighting 10-15 feet apart, pathway lights 12-18 inches. Safety tips include ambient lighting, LED fixtures, careful lighting placement, controlled illumination levels, aesthetic appeal, light colors, energy efficiency, maintenance guidelines for safety reasons.
How to Design Driveway Lighting?
Designers driveway lighting by light spacing 10 to 15, mixing driveway aesthetics with solar fixtures and LED options, adding motion sensors, wall sconces, pathway markers; consider color temperature, dimming controls, installation tips for balanced illumination.


