As an Amazon Associate, we earn from qualifying purchases. Some links on this site are affiliate links at no extra cost to you. Our recommendations are based on thorough research and editorial judgment.

How to Combine Decorative Garden Lights With Discreet Motion Sensors
1. Sensor fundamentals: Specify PIR or dual‑tech sensors, mount at 1.5–2.0 m, set detection 3–8 m for paths, 8–15 m for lawns, IP65 rating, stainless or powder‑coated aluminium. 2. Integration: Use parallel low‑voltage 18 AWG runs under 50 ft, or zoned relay groups for multiple fixtures. 3. Power: Prefer mains hardwire, consider solar‑hybrid batteries sized for 48–72 hour autonomy. Test coverage after dusk, document settings for seasonal adjustment, further guidance follows in subsequent sections here.
Key Takeaways
- Choose low-profile PIR or dual-technology sensors with IP65+ housings that match the decorative fixture style for discreet appearance and reliable detection.
- Mount sensors 1.5–2 meters high, angled toward walkways, and test coverage to align detection zones with decorative lights.
- Use parallel wiring or zoned low-voltage runs (18 AWG up to 50 ft) for independent control and easier troubleshooting.
- Prefer mains or hybrid solar+battery power for consistent operation; program sensitivity and timers (30s–5min) to reduce false triggers.
- Specify corrosion-resistant materials, clean lenses every six months, and integrate sensors with smart hubs for alerts and centralized control.
Understanding Motion Sensor Fundamentals
- Motion sensors use infrared technology and ultrasonic waves to detect movement, activating decorative garden lights within 0.5–5 meter ranges, typical detection angles are 90°–180°, ensuring prompt response.
- Passive infrared sensors detect thermal radiation from moving objects, they perform well in outdoor applications, maintain reliable operation when lenses are clean and positioned 1–2 meters above ground.
- Energy consumption drops when lights operate only on presence detection, yielding lower electricity bills, for example a 10 W LED reduces nightly use by up to 80% compared with always-on fixtures.
- Adjustable sensitivity and timers permit customization to local conditions, reducing false triggers from wind or small animals, regular maintenance preserves accuracy and longevity.
- Install sensors 1.5–2 m high, shield from lights, test monthly.
- For optimal security, consider using solar motion detection lights with IP65-IP68 weatherproofing for durability and reliable performance in various weather conditions.
Selecting the Right Sensor Type for Your Garden

When selecting the right sensor for decorative garden lights, evaluate site use, layout complexity, and environmental exposure, noting that passive infrared sensors detect heat signatures and excel in outdoor settings for foot traffic and animal movement. Choose motion sensors with a detection range of 15 to 30 feet to cover pathway lighting and entrances without interference from vegetation, and consider ultrasonic elements only where obstacles require sound-based detection indoors or in dense shrub corridors. Dual technology sensors combine PIR and ultrasonic functions for minimizing false alarms, and specify weather-resistant, IP-rated housings for long-term outdoor performance. Install lights at recommended heights for effective sensor coverage, ensuring solar panels receive unobstructed daylight for charging.
Recommended Products

【Super Bright & Long-Lasting】: Under fully charged, this solar light can provide a long working time about 20-25 hours in bright mode, can 5-9 nights continuous lighting at dim mode. Street solar light equipped with 196pcs high quality LED beads, reflector cup and 12.6V/42,000mAh battery
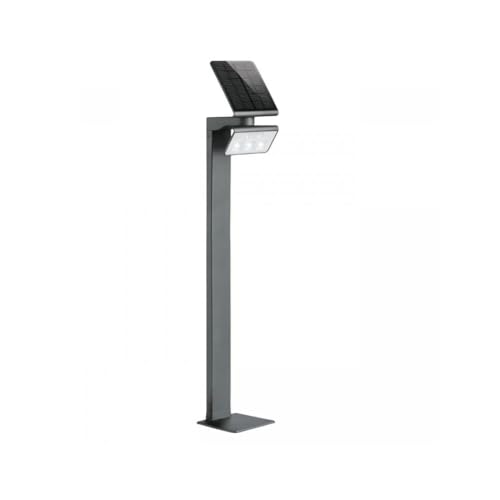
No power connection, no cost – Warm white 3000 K LED lighting of up to 20 m² area, can be used anywhere in garden, terrace, house entrance, carport and walkways as path lighting

Adjustable range patterns from 8' up to 40'. The 90 degree pattern can also be adjusted throughout a 180 degree field of view by simply swiveling the housing.
Matching Sensors to Decorative Fixtures
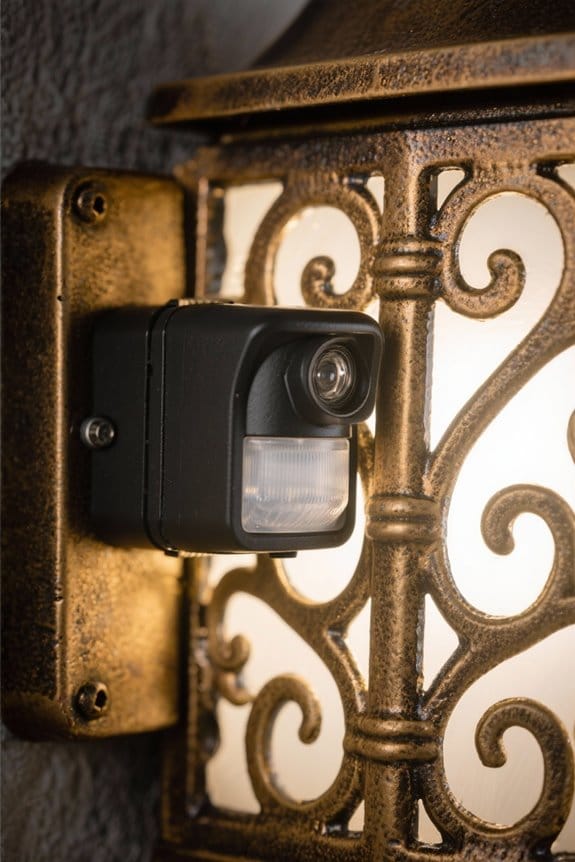
Following the earlier assessment of site use, layout complexity, and environmental exposure, 1) Sensor aesthetics and placement: specify low-profile housings under 25 mm depth and widths compatible with common decorative fixtures (40–80 mm), place sensors within lantern casings or on the rear flange of wall sconces at 1.2–1.8 m above grade to align the PIR sensor axis with typical pedestrian heat signatures, and guarantee the detection cone (typically 90° horizontal, 20° vertical) covers intended walkways out to 4.5–9 m without intersecting vegetation. 2) Sensor selection: prefer dual-technology motion sensors with lightweight, weather-resistant rating enclosures, choose stylish sensors that blend in and can be painted to match decorative garden lights for a cohesive look. For battery-operated systems, periodical battery replacements are advised to ensure optimal performance and longevity of the sensors. 3) Installation notes: test coverage, adjust sensitivity, document orientation and maintenance.
Recommended Products

VIDEO - 6K/60p Internal N-RAW video recording + oversampled 4K UHD, 4K/120p, Full HD/240p slow motion, Hi-Res Zoom up to 2x digital zoom during HD recording, 1.4x during 4K recording, line-in audio, professional monitoring tools and more.

High sensitivity and high resolution, Optical 12x ZEISS Vario-Sonnar T lens with lens ring, 24x Clear Image Zoom, ND filter control mechanism, Focus, Zoom, and Iris manual control

6” All-Season Aluminum Design: Lightweight and corrosion-resistant, these 6" electric running boards feature dual motors for smooth, reliable movement and a textured, slip-resistant step surface for all weather conditions.
Wiring Options: Parallel, Series and Zone Setups

When planning wiring options, the installer should evaluate site layout, sensor types, and expected loads to determine whether parallel, series, or zone configurations are most appropriate. 1. Parallel wiring: connect each motion sensor and decorative lights branch to supply so each sensor independently controls its load, typical cable run 18 AWG for low-voltage 12V systems up to 50 feet, use common neutral and separate switched positive, see wiring diagrams. 2. Series wiring: place sensors and lights in a single circuit path, note that one sensor failure opens the chain, reserved for fail-safe sequences or monitoring. 3. Zone setups: group sensors to control defined areas for targeted lighting, example three zones of 20 m2 each controlled by relays, guarantee sensors compatibility and proper load balancing. Consider using low voltage driveway lights with IP65 or higher ratings to ensure durability and weather resistance.
Recommended Products

PATH & AREA LIGHTING EXPANSION KIT - Includes four (4) solid brass Max Spread path & area lights, four (4) 3W 2700K warm white LED G4 bi-pin bulbs (300 lumens, 20W halogen equivalent), one (1) Pro Junction Hub that uses a robust system of rail-mounted clamp-type connectors, 100 feet of direct burial cable and four (4) easy-install Hammer Stakes, bundled for additional savings! Buy a transformer separately, or add this kit to your existing landscape lighting system.

【ALL-IN-ONE LANDSCAPE LIGHTING KIT & COST SAVING】 Buy the set for $399.99, buy the items separately for $480.95—save $80.96. Comes with everything you need: 12*5W landscape spotlights (with pre-installed MR16 LED bulbs), 1*200W low voltage transformer (timer & dusk-to-dawn sensor included), 1*150FT 14/2 AWG landscape wire, 12*wire connectors, and a user manual. No need to purchase additional accessories – truly plug-and-play for your outdoor lighting project
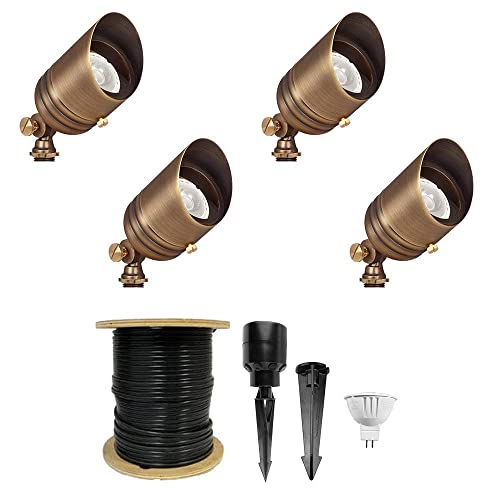
EXPANSION KIT - Includes (4) G2 Fat Boy brass spotlights with 25-foot lead wires; (1) Pro Junction Hub; (4) single-source 5W MR16 38-degree LED bulbs (30W halogen replacement) with warm white 2700K color temperature; (4) 10-inch Hammer Stakes; (1) 9-inch PVC ground stake; 100 feet of 14/2 premium direct burial cable. Purchase a low voltage transformer separately or use this kit as-is to expand an existing outdoor lighting system.
Power Sources: Mains, Battery and Solar Solutions

- Mains power: A primary energy source for decorative garden lights and motion sensors, mains power provides consistent reliability, standard supply permitting hardwired fixtures, circuits, and timed controllers that support continuous operation without battery replacement.
- Battery-powered solutions: Portable options use AA, C, or 12 V sealed lead acid batteries, enabling installation where outlets are absent, they require periodic replacement or recharge, expect runtimes of 100–500 hours depending on LED load and sensor duty cycle, compatibility with low-voltage motion sensors must be confirmed to maintain efficiency.
- Solar-powered lights and hybrid solution: Solar-powered lights harvest sunlight via PV panels, store energy in batteries, performance varies with insolation, combine panels with battery storage for extended use during cloudy periods, verify sensor compatibility and charge controllers. Consider the impact of winter on solar-powered lights, ensuring they function efficiently even in low sunlight and snow cover situations.
Recommended Products

OPENLUX Only Make High-Quality: Our LED post top light is ETL listed made of SMD3030 LED chips; High-end driver; heavy-duty aluminum Anti-shock, anti-moisture, no glare, no strobe light, protecting your eyes

Practical Fire Pit for Warmth & Ambiance:The set includes a table with a built-in fire pit. This feature provides warmth and ambient lighting, extending outdoor usability into cooler evenings.

Coffee Table with Integrated Solar Light :The table features a built-in solar lamp with an auto light sensor. After an initial 8-hour direct sun charge, it provides up to 6 hours of automatic evening illumination.
Concealing Sensors Without Sacrificing Performance
1. Install strategy: Motion sensors for decorative garden lights should be mounted six to ten feet high to maximize detection range, while using low-profile designs and miniature housings to enable discreet integration without visual disruption. 2. Integration techniques: Concealment is achieved by integrating sensors into garden features such as trellises, decorative poles, rocks, or planters, employing camouflage patterns and finishes that match surrounding materials, and ensuring wiring is hidden within structures. 3. Performance settings: Adjustable sensitivity must be used to prevent false triggers from small animals or wind-blown foliage, calibrating range and time delays during commissioning. 4. Practical note: Functionality and aesthetic appeal coexist when components are selected for scale, finish, and field of view. Installers should document settings and review performance seasonally, regularly. 5. Maintenance considerations: Regular cleaning of solar panels is necessary to enhance efficiency and ensure optimal performance of motion sensors integrated with decorative garden lights.
Ideal Sensor Placement for Pathways, Patios and Beds
Although sensor height and aiming determine coverage geometry and sensitivity, ideal placement for pathways, patios, and beds follows a systematic, measurable strategy to balance safety, aesthetics, and false-trigger mitigation. 1. Pathways: Mount motion sensors 0.9–1.2 m high at pathway edges, spaced every 6–10 m to detect lateral and longitudinal approach, use low-level path lights paired within 0.5 m for graduated illumination, guarantees visibility and safety. 2. Patios: Install sensors at patio perimeters, 1.2–1.5 m above floor, angled 30–45° to cover entries while minimizing stray activation, discreet placement behind planters preserves garden design. 3. Beds: Position sensors low, 0.6–1.0 m, coordinated with uplighting fixtures placed 0.3–0.6 m from plant bases, highlights foliage and provides deterrent illumination. High lumen output from security lights such as the Barn Lights ensures effective coverage and enhances safety features in outdoor areas. Sensor placement follows these guidelines for reliable, unobtrusive operation.
Recommended Products
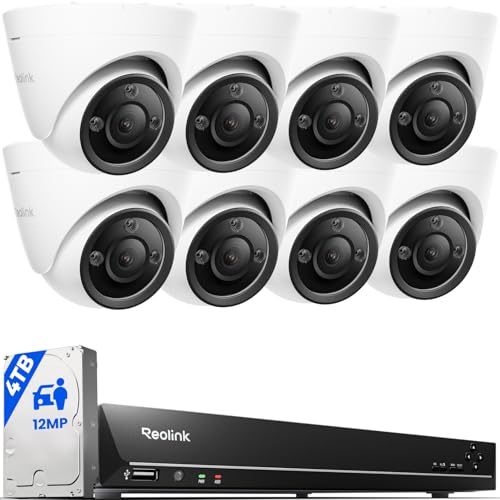
INCREDIBLE 12MP UHD IMAGE -- Mind-blowing 12MP PoE home security camera system becomes affordable for your home and business security. Subtle details are recorded to ensure your peace of mind.

Handcrafted in Pennsylvania by Amish craftsmen
Angle of view (35mm): 84°-34° ; E-mount Lenses
Adjusting Range, Sensitivity and Timer Settings
Frequently, installers and homeowners recalibrate motion sensors during initial commissioning and seasonal changes to achieve a balance between effective coverage, nuisance reduction, and energy efficiency, adjusting detection range, sensitivity thresholds, and timeout intervals to match site geometry, vegetation, and expected traffic patterns. 1. Range: Set adjusting range to cover paths 3–8 m for walkways and 8–15 m for lawns, reduce overlap toward roads to avoid false triggers, adjustable lens or dip switches. 2. Sensitivity: Calibrate sensitivity to ignore animals by lowering PIR gain, test at 1–3 and 5–7 m, document settings for seasonal review. 3. Timer settings: Program timer settings from 30 seconds to 5 minutes to balance outdoor lighting energy consumption for decorative garden lights, monitor for ideal performance under changing environmental conditions. Solar-powered lights, known for their environmentally friendly nature and energy efficiency, further enhance outdoor lighting solutions by minimizing operational costs.
Weatherproofing and Durable Fixture Materials
When selecting outdoor lighting, installers and specifiers should prioritize robust construction and specified protection levels, because site exposure, proximity to salt air, and mechanical impact determine required materials and seals. 1. Durable fixture materials and finishes: Specify corrosion-resistant stainless steel, aluminum with coating, or brass alloys, choose UV-resistant finishes to limit solar degradation, use powder-coat thicknesses of 60–80 microns. 2. Weatherproofing and ratings: Require weatherproof ratings IP65 or higher for garden lights and motion sensors, guarantee gaskets and sealed cable entries meet NEMA 4X where salt spray is present in outdoor settings. 3. Installation and maintenance: Place sensors in sheltered orientations, perform lens cleaning and seal inspections every six months, replace degraded seals and. Follow manufacturer torque and grounding specifications. Additionally, incorporating energy-efficient LED lights can significantly reduce electricity consumption and enhance the longevity of outdoor lighting systems.
Integrating Sensors With Smart Home Systems
1. Integration overview: Integrating motion sensors with smart home systems enables centralized control of outdoor lighting, combining decorative garden lights with automated triggers, reducing manual operation and improving security. 2. Sensor selection: Choose passive infrared (PIR) or dual-technology sensors rated IP65, with adjustable sensitivity and 120° detection cones, 6–12 m effective range, matching landscape scale. 3. Configuration: Use smart home hubs supporting Z-Wave, Zigbee, or Wi‑Fi, assign sensors to lighting scenes, enable customizable settings and schedules via mobile apps, set motion hold time to 30–300 seconds. 4. Notifications and energy conservation: Configure real-time alerts to smartphones, log events for audit, and enable energy conservation by limiting duty cycles and brightness levels during inactive hours. Test connectivity range, adjust placement, and document configurations for maintenance.
Testing, Commissioning and Fine‑tuning Coverage
A systematic commissioning process begins with individual sensor testing, documented coverage mapping, and temporal verification, ensuring each detector meets performance criteria before permanent installation. 1. Preparation: Verify product specs, use temporary mounting at 1.8–2.4 m to approximate human detection profiles, confirm decorative garden lights power and control interfaces. 2. Individual testing: Activate motion sensors one at a time, record coverage area using marked grids of 1 m squares, note sensitivity settings and detection distances. 3. Night‑time tests: Perform tests after dusk, simulate approach velocities of 0.5–1.5 m/s, observe light activation and latency. 4. Fine‑tuning: Adjust angles, reduce sensitivity to prevent pet and vegetation triggers, clean sensor lenses, revalidate functionality. 5. Documentation: Log settings, positions, and final measurements. Retain records for seasonal readjustment scheduling annually. For optimal performance, ensure detection specifications such as range and angle are precisely set to cover all necessary areas without leaving blind spots.
Routine Maintenance and Troubleshooting Tips
Because regular maintenance preserves sensor reliability and lighting efficiency, the following numbered sections outline inspection, cleaning, adjustment, wiring checks, and documentation procedures. 1. Inspection: inspect decorative garden lights and motion sensors every 3 months, verify operational status, check for debris within 30 cm of sensor field, note performance anomalies. 2. Cleaning: clean sensor lenses with a lint-free cloth and 70% isopropyl solution, avoid abrasive agents, dry for 10 minutes before power restoration. 3. Adjustment: adjust sensitivity settings and sensor angles as environmental factors change, set detection range to 6–12 m where appropriate. 4. Wiring: test wiring connections for continuity with a multimeter, repair loose crimps and replace damaged cable. 5. Documentation: log maintenance and troubleshooting steps for future reference. Retain records for warranty purposes.
Frequently Asked Questions
Can You Add Motion Sensors to Existing Lights?
Yes. Professionals weigh motion sensor compatibility, decorative light options, adding sensors, sensor types comparison, installation process, power source considerations, security features enhancement, ambient lighting impact, sensor placement tips, and energy efficiency benefits for improved safety.
What Are Two Drawbacks of Using Motion Sensors?
Two drawbacks are frequent false triggers and increased installation costs. They suffer from motion sensor accuracy and range limitations, sensitivity settings, weather resistance concerns, compatibility issues, maintenance requirements, aesthetic impact, and overall power consumption problems.
How to Mix and Match Outdoor Lighting?
To each their own, homeowner mixes fixture types, balances color temperature and brightness levels, plans light placement and lighting layers, matches style coordination with landscape features and seasonal themes, adjusts sensor sensitivity, prioritizes energy efficiency.
How to Put Outdoor Lights on a Sensor?
One installs compatible motion sensor. sensor installation tips, outdoor lighting guide, motion detection technology, sensor sensitivity settings, wiring considerations outdoors, aesthetic design options, garden ambiance lighting, sensor placement strategies, energy efficiency benefits, smart home integration


