As an Amazon Associate, we earn from qualifying purchases. Some links on this site are affiliate links at no extra cost to you. Our recommendations are based on thorough research and editorial judgment.

How to Safely Replace Old Bulbs in Motion‑Activated Fixtures
1. Isolate: Switch main breaker off, verify 0 V with a 600 V CAT III meter, use 1000 V insulated gloves and non‑contact tester. 2. Access: Use ladder, remove cover with Phillips or 4 mm flat screwdriver, note 14–18 AWG conductors. 3. Replace: Remove bulb, install compatible halogen or incandescent rated for fixture wattage, seat firmly and secure wiring with approved connectors. 4. Test: Restore power, adjust sensitivity and timer. Continue for troubleshooting and adjustments.
Key Takeaways
- Turn off power at the breaker and use a non‑contact voltage tester to confirm zero volts before touching the fixture.
- Wear insulated gloves, eye protection, and use a stable ladder when removing and installing bulbs.
- Remove the cover, unscrew the old bulb carefully, and replace with a manufacturer‑recommended, sensor‑compatible bulb.
- Inspect wiring, terminals, and seals for corrosion or damage; tighten connections and reseal outdoor boxes with silicone if needed.
- Restore power and test sensor sensitivity and timer settings, adjusting for correct detection range and duration.
Tools and Materials Needed

You may be interested

Equipment. 1. 1. Tools: A concise kit should include a voltage meter rated for 600 V CAT III, a flat and Phillips screwdriver set (sizes 2.5–6 mm), insulated pliers, and wire connectors for 14–18 AWG, ensuring correct torque and contact. 2. Materials: Use electrical tape rated for 600 V, replacement bulbs matched to fixture wattage and type (LED or halogen), and silicone caulk for outdoor junction boxes to prevent moisture ingress. 3. Handling: Wear protective gloves when touching halogen bulbs to prevent oils from shortening lamp life, and store bulbs in anti-static packaging. 4. Implementation: Verify tools function before use, label removed fasteners, and organize parts to maintain safety and streamline installation. Confirm compatibility with fixture specifications and document bulb type and date installed. Consider using solar-powered outdoor lighting solutions that offer efficient energy conversion and weather resistance for enhanced durability in various environments.
Recommended Products

PIR Motion & Dusk to Dawn Activation: Motion sensor light bulb automatically lights up in the dark (8-16 feet) when motion is detected, and it turns off after 30-45 seconds. It activates only at night or in low light (<15Lux), remaining off during the day

Simple Setup: Screw GE LED+ Motion Sensor light bulb into a fixture that fits an E26 medium base and turn on the power; light will turn on automatically when motion is detected at night - no app, hub or Wi-Fi needed!
Safety Precautions Before You Start

1. Before beginning, verify safety by switching off electricity at the main fuse box or specific circuit breaker controlling the fixture, labeling the breaker if needed to prevent accidental reclosure. 2. Verify absence of voltage using a calibrated non-contact voltage tester or multimeter set to AC volts, placing probes on fixture contacts, read zero volts before proceeding. 3. Confirm wall switch is in the OFF position, and lock out or tag the breaker when possible. 4. Wear appropriate personal protective equipment including insulated gloves rated for 1000 V, eye protection, and sturdy footwear to reduce electrical work hazards. 5. Follow local electrical codes and consult a licensed electrician if any uncertainty exists. Reassurance: professional help is recommended for complex or high-voltage installations and emergencies. Additionally, ensure that any motion sensor lights you are working with are properly installed with tool-free methods like stakes or flange mounts, and are spaced 6-10 feet apart for optimal coverage.
Recommended Products

Be aware of voltage easily - the tip glows red and a beeper sounds when voltage is detected

Integrated Voltage tester & Screwdriver - The VTS1000H includes a high-strength steel screwdriver at the tail. This Two-in-One tool is practical for wire checking and everyday electrical projects. It can differentiate between the live and neutral wires in cables and at the outlet, switch, and junction box. Easy to use for breakpoint tests. Safety rating: CAT IV 600V, CAT III 1000V

SAFETY FIRST: It will send out multiple alarms through sound and light. When the voltage is detected, the tip will send out red light and beep. When the higher the sensed voltage is, or the closer it is to the voltage source, it beeps at a higher frequency and the percentage value will be larger. At the same time, the screen will be red or green, red means high voltage and live wire are detected, green means low voltage and null wire are detected
Step‑by‑Step Bulb Replacement Procedure

Section 1 — Preparation and access, describing required tools, safety checks, and bulb specifications before physical removal of any components: before any contact is made with the fixture, the technician must confirm power is isolated at the breaker, verify zero voltage at the fixture with a calibrated meter, and don insulated gloves rated for 1,000 V and eye protection, while staging a Phillips head screwdriver (No. 2), a ladder meeting EN 131/ANSI A14.2 standards at a working height appropriate to the installation, and replacement bulbs specified by base and wattage (for example, E26 medium base, 60 W incandescent equivalent or 9–12 W LED with CRI ≥ 80). When replacing bulbs in outdoor fixtures, it is important to consider weatherproofing standards like IP65 to ensure durability and safety. 1. Remove cover, avoid motion sensor, unscrew bulbs, replace the bulbs. 2. Seat bulbs, secure wiring, replace the fixture, verify outdoor lighting, safety.
Recommended Products

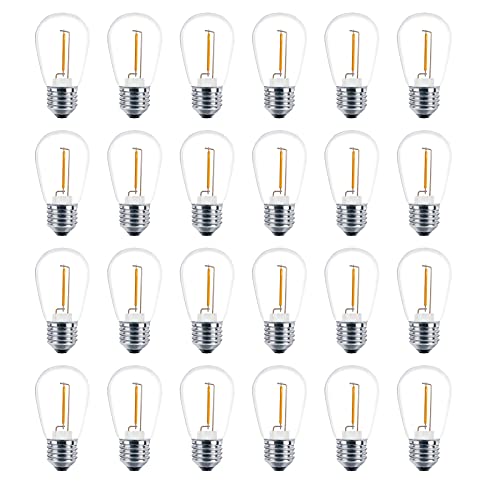
【Dimmable E26 Bulb】 S14 light bulbs with a plastic high clear shell are a reliable and drop-resistant alternative to glass bulbs. Dimmable edison light bulbs would be perfect Christmas decoration lights for your garden, backyard and balcony terrace, they are also an excellent decorative lighting for indoor wedding party

Shatterproof & Waterproof - These outdoor string light bulbs used high-quality waterproof PC shell,which can effectively prevent accelerated aging caused by ultraviolet, and are suitable for outdoor use at -20 ℃~40 ℃, not easy to fragile
Warm Tips: Do not work with solar string lights.
Testing and Adjusting the Motion Sensor

2. 1. Verify sensitivity settings following the manufacturer’s guide, set within the 3–10 meter range to allow the motion sensor to detect movement reliably at common approach angles, test by walking at 1, 3 and 6 meters and at 0°, 45° and 90° relative to the fixture. 2. Confirm timer settings, adjust on the unit to the desired duration, commonly 10 seconds to 10 minutes, and observe whether the light remains on for the selected interval. 3. Inspect for obstructions such as branches, vents, or structural overhangs that reduce the detection field, remove or reposition obstacles to restore full coverage. 4. If flickering occurs with LED bulbs, use compatible incandescent or halogen replacements or upgrade the sensor to an LED-compatible model for reliable operation. 5. Consider adding motion sensors to your solar path lights to enhance security around your home.
Recommended Products

【3 Modes Control】[AUTO]: At night, activate connecting devices once detecting motion and OFF after a preselected delay time; [DUSK TO DAWN]: work automatically at dark and not be triggered in the daytime; [Manual Override Mode]: turn wall switch OFF and ON within 3 seconds, devices will keep ON for 8 hours and return to Auto Mode automatically

【3 Modes in 1 Motion Sensor】"Auto Mode" when movement is detected in darkness the light will turn on & after 1min to 10 minutes it will turn off depending on your setting; "D2D Mode" Automatically turns on at night and stays off at daytime, work only in the night; "Manual Override Mode" allows manual control on and off, light will keep on for 8h but will auto turn off at dawn.

360° PIR Sensor - With a ceiling mount occupancy sensor and motion detection, you can effortlessly control your lighting, providing convenience and energy efficiency. Mountable up to 15 feet high.
Troubleshooting Common Problems
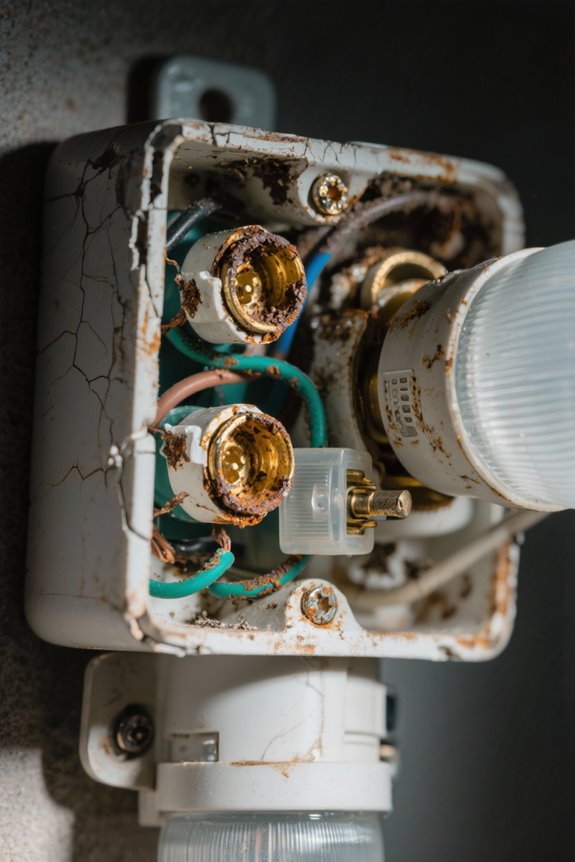
When a motion-activated fixture fails to perform as expected, a systematic troubleshooting approach minimizes risk and isolates the root cause efficiently for repair or replacement. 1. Power isolation and verification: turn power off at the main breaker, lockout where possible, then use a voltage meter to confirm zero volts at the fixture before touching wiring or bulbs, this prevents electric shock and allows safe inspection. 2. Bulb and sensor compatibility: if flickering occurs after replacing bulbs, verify LED compatibility with sensor specifications, use bulbs within manufacturer wattage and base type, swap with a known-good incandescent to test. 3. Wiring and component inspection: examine connections for corrosion, loose screws, or damage, measure continuity and replace damaged conductors, promptly consult a licensed electrician if issues persist. Using IP65-rated lights ensures durability against various weather conditions, making them ideal for long-term outdoor use.
Recommended Products

【9000LM SUPER BRIGHT 4 HEAD FlOOD LIGHT】With an output of 80W, this floodlight emits a powerful 9000 lumens of 5000K light. The four adjustable heads and unique four beam design provide uniform and extensive illumination, ensuring coverage of up to 2,370 sq. ft. Additionally, it offers over 88% energy savings compared to traditional halogen bulbs.

ENERGY SAVING: LED units output 72W, 7500 Lumens, 5000K brightness(daylight white), equivalent to 720W incandescent bulb. Also save your electricity bill by up to 88%.

Hardwire connection, NO battery powered, NO solar powered, NO plug in, NO camera
Frequently Asked Questions
Can You Change the Bulb in a Motion Sensor Light?
Yes. They should confirm bulb compatibility issues and consider installation challenges; following fixture maintenance tips preserves energy efficiency benefits and bulb lifespan considerations, while verifying sensor sensitivity settings to guarantee proper operation and avoid faults.
How to Not Get Electrocuted When Changing a Light Bulb?
They prevent electrical shock by following safety precautions: switching off the main breaker, verifying with a non‑contact tester, wearing personal protective gloves, considering bulb types, performing wiring inspection, avoiding metal tools, following regular fixture maintenance.
What Are the Disadvantages of Motion Sensor Lights?
Like a paranoid bouncer, motion sensor lights suffer from false triggers, limited sensor sensitivity, higher cost implications, installation challenges, increased maintenance requirements, and unexpected energy consumption when misconfigured, leading to homeowner frustration and diminished reliability.
Do You Need Special Bulbs for Motion Lights?
Not necessarily. They should consider bulb compatibility issues and energy efficient options; choose appropriate LED vs incandescent based on motion sensor types, match brightness ratings, and heed fixture design considerations for reliable performance and longevity.


