As an Amazon Associate, we earn from qualifying purchases. Some links on this site are affiliate links at no extra cost to you. Our recommendations are based on thorough research and editorial judgment.

Routine Seasonal Checklist for Outdoor Motion Path Lighting
1) Why maintenance matters: schedule monthly inspections for dust, debris, sensor response, and annual component replacement every 12–36 months to guarantee reliability. 2) Safety checks: isolate power, verify with meter, inspect mounts, wiring, IP65 ratings, and clearance of 2–3 feet. 3) Alignment and cleaning: tilt fixtures 30–45°, calibrate sensors to 5–12 m, set hold times 30–90 s, clean quarterly. 4) When to call a professional: voltage drops, persistent flicker, or failed calibrations; further guidance follows.
Key Takeaways
- Inspect fixtures monthly for debris, cracks, corrosion, and secure mounts; document any issues for follow-up.
- Turn off power and visually check wiring insulation, connectors, and conduit burial depth before repairs.
- Clean lenses quarterly with mild soap, remove vegetation, and aim beams downward at a 30–45° tilt.
- Test and calibrate motion sensors for 5–12 m range, 30–90 s hold time, and adjust sensitivity to prevent false triggers.
- Replace worn bulbs/batteries every 12–36 months and call a professional for persistent flicker, voltage drop, or sensor failures.
Why Routine Maintenance Matters for Motion Path Lighting

Maintenance is foundational to motion path lighting reliability, ensuring consistent illumination, sensor responsiveness, and component longevity. Inspection and cleaning: Technicians should inspect your outdoor lighting fixtures monthly, removing dust, debris, and spider webs which can obscure sensors, using a brush, 60–80% isopropyl solution for lenses, to restore detection range and reduce false triggers. Component replacement: Replace worn components such as bulbs, batteries, and corroded wiring at first sign of degradation, typically every 12–36 months depending on usage, voltage, and environmental factors, to prevent system failures, safety hazards, and costly repairs. Alignment and testing: Adjust beam angles, verify coverage with a 1–2 m offset walk test, and confirm sensors respond within 1–3 seconds. Seasonal maintenance preserves performance, extending lifespan and reducing replacements. Consider using LED technology for improved energy efficiency and reduced maintenance due to its long operational lifespan.
Safety Checks Before You Begin

Before any work begins, the servicing technician shall perform a systematic set of safety verifications to eliminate electrical hazards, identify physical obstructions, and confirm sensor and fixture integrity, using lockout‑tagout procedures and calibrated test instruments where applicable. 1. Power isolation: turn off the power at source, verify deenergization with a calibrated meter, document lockout‑tagout, this minimizes safety risk. 2. Visual inspection: examine the outdoor lighting system pathway for debris, overgrowth, animal damage, frayed or exposed wires, and loose fixtures, note locations. 3. Sensor and fixture checks: confirm proper alignment of motion sensors to target zones, verify torque on mounts to manufacturer torque specs, test functionality. 4. Connections and cleanliness: tighten connectors, remove corrosion, and record findings for follow up maintenance and schedule corrective actions. Additionally, ensure that outdoor fixtures have an IP65 rating for weather resistance, as this enhances durability against the elements.
Conduct a Seasonal Walk‑About Inspection

How should a technician perform a seasonal walk-about inspection to detect fixture damage, sensor malfunctions, obstructions, and wiring deterioration across the motion path lighting system? 1. Inspect fixtures visually for signs of damage, such as cracks, chips, loose lenses, and corrosion, measure gaps with a 3–5 mm feeler or visual gauge, document defects for repair. 2. Test motion sensors for range and angle, trigger detection at 5, 10, and 15 feet, note delayed response times or blind zones, recalibrate or schedule replacement when thresholds are unmet. 3. Check for obstructions and overgrown vegetation, trim to restore 2–3 foot clearances, remove snow and ice accumulations promptly. 4. Scan wiring visually for wear or fraying, verify secure routing, record items needing maintenance for your outdoor lighting systems. Additionally, ensure that the fixtures are made from durable materials like die-cast aluminum to withstand outdoor conditions and prevent rust and corrosion over time.
Recommended Products

【Say goodbye to darkness and high electricity bills】Tired of dark driveways or expensive electric bills? This solar street light provides a powerful 25000W equivalent brightness using 0 electricity. Simply mount it outdoors, and it charges automatically during the day. You get a reliably lit property at night without increasing your monthly expenses or needing complex wiring, giving you peace of mind and instant savings.

POWERFUL OUTPUT: Bring ultra bright performance to indoor commercial areas with a 150W UFO LED high bay light that produces 21,000 lumens at high efficiency (140 lm/W). These UFO high bay lights are built for LED high bay lights upgrades in a warehouse, workshop, or garage, delivering clear visibility for work areas, storage aisles, and equipment zones.

【 Ultra-Bright Outdoor Lighting for Parties & Gatherings】Equipped with 240 bright 5054 type LEDs and a 118-inch pole, this solar post light delivers 50000 lumens to illuminate up to 3500 sq.ft. It creates a vibrant, welcoming ambiance for patios, backyards, BBQs, and evening events, making it the ideal all-in-one solution for unforgettable outdoor celebrations.
Inspect and Protect Wiring and Connections
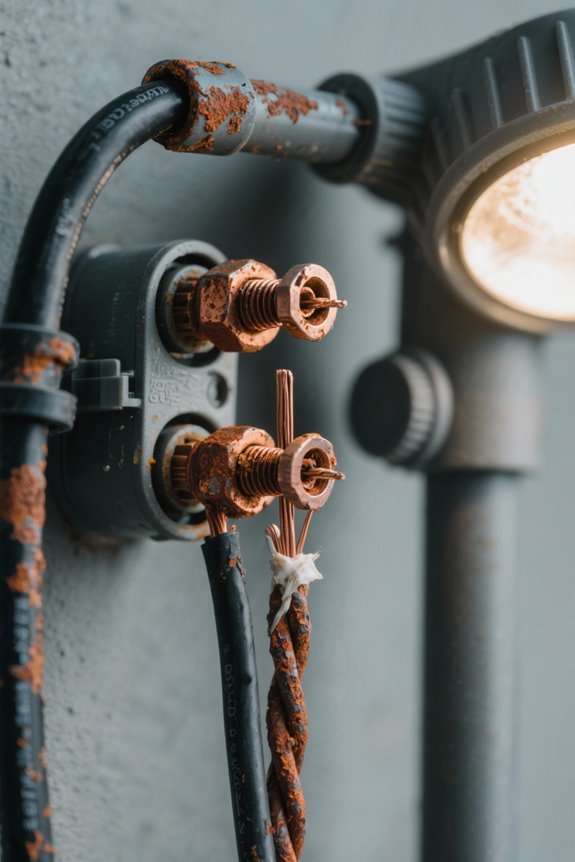
- Inspection: Conduct routine visual inspections of outdoor wiring to identify fraying, exposure, animal chewing, or other signs of damaged insulation, document locations, and prioritize repairs based on hazard level, guaranteeing safety.
- Burial and routing: Ascertain conductors are buried at least six inches deep in suitable conduit or covered trench to protect from gardening tools and surface weathering, and route cables away from high-traffic areas.
- Connections: Secure all connections with weatherproof connectors, use dielectric grease where appropriate, and tighten terminals to eliminate moisture penetration that causes corrosion and malfunction.
- Maintenance actions: Replace compromised sections immediately, schedule periodic rechecks, and keep records for future diagnostics, which reassures maintenance consistency. Inspectors note animal activity and label repaired runs with date and installer initials.
- Ensure outdoor lights have a waterproof rating of IP65 or higher to protect against moisture and ensure they function reliably in extreme temperatures.
Clean and Align Fixtures for Optimal Performance

Section 1: Overview: Following inspection and protection of wiring and connections, attention shifts to the fixtures themselves, where routine cleaning, precise alignment, and structural checks preserve lumen output and photometric distribution, minimize glare, and reduce accident risk along walkways. 1) Cleaning procedure: Technicians should clean landscape lighting fixtures with a mild soap solution, use a soft cloth, remove dirt and insect debris, rinse with clear water, dry to prevent corrosion, repeat quarterly or after storms. 2) Alignment and positioning: Align fixtures to direct beams along paths at 30–45 degree tilt, set heights 6–12 inches above grade to maintain visibility and avoid snow cover. 3) Structural inspection: Replace damaged components, tighten mounts, verify stability to guarantee peak performance. Document actions and schedule next service interval. Additionally, for enhanced durability, ensure that solar pathway lights have an IP65 waterproof rating to withstand various weather conditions and extend their lifespan.
Recommended Products
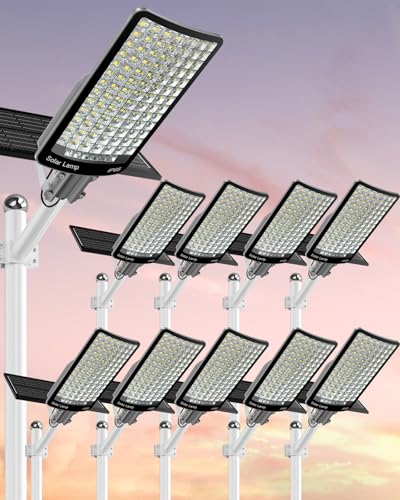
【Ultra-Bright 300,000 Lumens with 340° Wide Angle】Experience unparalleled illumination with our solar street light, powered by high-density 5054 oversized LED beads. Delivering a massive 300,000 lumens and a 340° ultra-wide beam angle, it brightly covers up to 6000 square feet, making dark areas like parking lots, driveways, and large yards as clear as day.

𝐇𝐞𝐚𝐯𝐲-𝐃𝐮𝐭𝐲 𝐒𝐨𝐥𝐢𝐝 𝐁𝐫𝐚𝐬𝐬: Gardenreet premium pathway light is built to last. Completely rust-resistant for salty or humid climates, it outperforms aluminum by over 10x. Achieve a designer landscape effortlessly — Once you install, lifelong you use
𝐇𝐞𝐚𝐯𝐲-𝐃𝐮𝐭𝐲 𝐒𝐨𝐥𝐢𝐝 𝐁𝐫𝐚𝐬𝐬: Gardenreet premium pathway light is built to last. Completely rust-resistant for salty or humid climates, it outperforms aluminum by over 10x. Achieve a designer landscape effortlessly — Once you install, lifelong you use
Replace Bulbs and Upgrade to LED Options
1) Inspect and replace bulbs promptly to maintain outdoor landscape lighting performance and safety and security; replacing burned-out bulbs within 48–72 hours prevents dark zones and trip hazards. 2) Upgrade to LED options to reduce energy usage by up to 75%, choose 2700–3000K color temperature for pathway uniformity, and select 300–800 lumen outputs depending on fixture spacing. 3) Follow manufacturer recommendations for replacement intervals, record lumen maintenance data, and verify IP ratings for moisture resistance. 4) When servicing, de-energize circuits, check for damaged wires, corroded sockets, and use silicone-filled connectors rated for outdoor use. 5) Lighting tips: document fixture locations, note beam angles, and schedule seasonal inspections; replace bulbs per wattage specifications, retain spares, and consult a licensed electrician for complex repairs annually. 6) Consider using low voltage systems to enhance energy efficiency and ensure safety, as these systems consume less energy and operate at a safer voltage level for residential areas.
Recommended Products
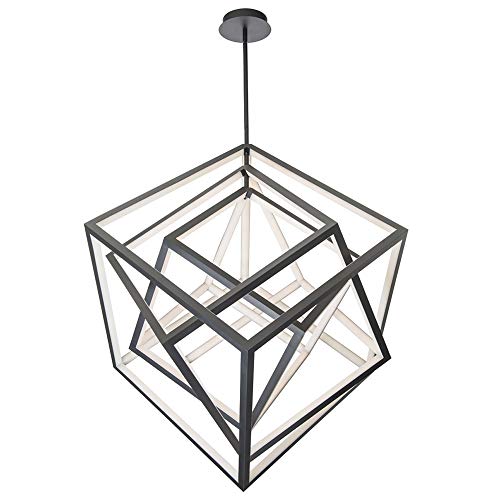
Cubes rotate independently for creative display options. Stack all three cubes in the same direction for a stunning 3D cubed effect, or adjust independently for your own creative design.
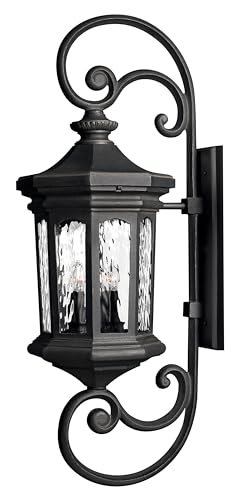
Part of the Estate Collection: Carefully curated for stately exteriors, these Hinkley outdoor fixtures were designed for expansive properties With extended outdoor living spaces

PREMIUM STAINLESS STEEL - This version of the Fat Boy is constructed of 316 stainless steel with a brushed finish to add a sleek, modern look to any outdoor space. The body, knuckle, screws and knobs are each made of stainless steel. Grade 316 stainless steel is an alloy of iron, chromium, nickel and molybdenum. It is ideal for outdoor applications due to its strength and resistance to corrosion (rust), even in high-saline environments like coastal areas.
Adjust Timers, Photocells, and Seasonal Settings
An effective seasonal control strategy for timers, photocells, and motion sensors guarantees path lighting activates reliably as daylight hours shorten, minimizes energy waste through precise illuminance thresholds, and maintains detection performance by adjusting sensor range and timing parameters to seasonal settings. Timer scheduling: adjust timers to match peak home activity, program on/off with 5-10 minute precision, use astronomical clocks where available, improving outdoor lighting reliability and occupant safety. Photocell calibration: reset illuminance setpoints to 10-30 lux for autumn and winter, test at dawn and dusk, replace faulty photocells during maintenance to maximize energy efficiency. Motion sensor alignment: align and calibrate sensors for 5-12 m detection range, set hold times to 30-90 seconds, and adjust sensitivity to prevent false activations from traffic. Consider using energy-efficient designs with motion sensors to further reduce electricity costs while maintaining safety and functionality.
Recommended Products

MULTI-ZONE SYSTEM: Includes multiple indoor air handlers for individual rooms connected to a single outdoor condenser. Each indoor unit features independent temperature control settings.

Nikon designed back side illuminated (BSI) full frame image sensor with no optical low pass filter

Advanced 24.2MP BSI full frame Image Sensor w/ 1.8X readout speed.Aspect Ratio - 3:2, Headphone Terminal : Yes (3.5 mm Stereo minijack), Mic Terminal : Yes (3.5 mm Stereo minijack). Brightness Control (Viewfinder) : Auto/Manual (5 steps between -2 and +2).
When to Call a Professional for Repairs or Upgrades
1. Indicators for professional intervention: When to call a professional includes persistent flicker or dimming after bulb replacement, voltage drop exceeding 10%, or resistance anomalies on conductors detected during testing. 2. Safety faults discovered during routine checks require action, exposed and damaged conductors or fixtures must be isolated, power shut at breaker, then consult a professional for repair. 3. Sensor and control failures: if a motion sensor fails to activate within its 120° detection arc, or response time exceeds 0.5 seconds, seek expert troubleshooting. 4. Upgrade projects: switching to 3000–4000K LEDs, increasing circuit load by over 20%, or adding zones beyond three warrants professional design and installation. 5. Failed DIY attempts: halt further work, consult a professional to prevent damage to the lighting system. Additionally, for solar lights with motion sensor efficiency, ensure your fixtures have a detection range of 40-60 ft and prioritize those with adjustable angles for effective security coverage.
Frequently Asked Questions
Do Motion Path Lights Require Permits or Comply With Local Outdoor Lighting Ordinances?
They usually need to check local regulations; permit requirements vary by jurisdiction, lighting ordinances and zoning laws can restrict fixtures, installation guidelines must be followed, and neighborhood associations may impose additional rules and fines apply.
How Do Motion Lights Affect Property Resale Value or Curb Appeal?
Like a welcoming lantern, motion lights can boost curb appeal and resale value by enhancing property aesthetics, improving outdoor safety and home security, supporting energy efficiency, aiding landscaping enhancement, and positively shaping buyer perception overall.
Can These Fixtures Integrate With Home Automation Systems or Voice Assistants?
They can integrate with smart home integration and voice control compatibility, offering automation benefits, energy efficiency features and user convenience enhancements; technology advancements enable seamless scheduling, remote control, and adaptive sensor-driven operation for homeowners worldwide.
What Is the Best Way to Recycle or Dispose of Old Bulbs and Fixtures?
They should use local recycling programs and disposal options for bulbs and fixtures, avoid hazardous waste streams, prefer eco friendly choices, recycle each light bulb properly, and consider fixture donation to extend usable life responsibly.
Do Motion Sensors Disturb Wildlife or Attract Pests at Night?
Like a moth to flame, motion detection does not greatly disturb wildlife; however, sensor placement and light intensity influence wildlife safety, nocturnal creatures’ behavior, pest attraction, and broader environmental impact, so careful design minimizes effects.


