As an Amazon Associate, we earn from qualifying purchases. Some links on this site are affiliate links at no extra cost to you. Our recommendations are based on thorough research and editorial judgment.

Motion Sensor Bulb Placement Ideas for Porches and Side Doors
1) Sensor selection: specify dual‑tech PIR/microwave for porches and side doors, mount at 6–8 ft above grade, tilt 20°–45°, limit detection cone to 10–30 ft to reduce false triggers. 2) Placement: center over threshold or offset 2–3 ft to avoid glare, add overlapping units for wider walkways. 3) Wiring and power: use 14 AWG on 15 A circuits or 12 AWG for 20 A, de‑energize before work. Further actionable setup and tuning follow instructions below.
Key Takeaways
- Mount motion-sensor bulbs 6–10 feet high (ideal ~8 ft) and angle them down 20°–45° to focus on thresholds and walkways.
- Use dual-technology (PIR + microwave) sensors or adjustable sensitivity to minimize false triggers from wildlife and reflections.
- Place fixtures to provide overlapping sensor coverage at entrances and along walkways, avoiding obstructions and direct sky views.
- Choose weatherproof LED bulbs (2700–4000K) with long life, set on-times 10 seconds–20 minutes, and verify compatible power wiring.
- Inspect quarterly: clean lenses, realign sensors within ±5°, remove debris, and update firmware or replace faulty components promptly.
Choosing the Right Sensor Type for Your Porch and Side Door
1. Selecting sensor type for a porch or side door requires assessment of coverage area, target profile, and environmental factors. 2. Passive Infrared (PIR) sensors are recommended for typical entry points, they detect movement by sensing changes in heat signatures from human bodies, offering reliable human detection with low power consumption. 3. Microwave sensors transmit radio waves to cover larger zones, they detect motion through reflected wave changes and are suitable for wide porches or obstructions. 4. Dual-technology sensors combine PIR and microwave modalities, they require concurrence to trigger alarms, reducing false activations from pets, wind, or vehicular passersby, while maintaining high human detection confidence. 5. Implementation should prioritize sensor field-of-view mapping and compatibility with existing lighting circuits. Consult product datasheets for environmental tolerances. 6. Solar panels should be oriented south at a 20-35° tilt for optimal sun exposure, as this significantly enhances the efficiency and performance of solar-powered sensor lighting systems in outdoor environments.
Recommended Products

DIGIC X PROCESSOR WITH 8K VIDEO: Offers outstanding definition and realism with 16x the resolution of FHD video and an ISO range of 100-51200 (expandable to 102400) for crisp and vibrant photos and movie-theater-quality videos at up to 8K/60P
100MP Hasselblad Camera: 4/3 CMOS sensor with Hasselblad Natural Color Solution delivers 6K/60fps HDR video and ultra-detailed 100MP photos for professional-grade imaging

A whole new level of camera intelligence from new AI processing unit.Aspect Ratio : 3:2
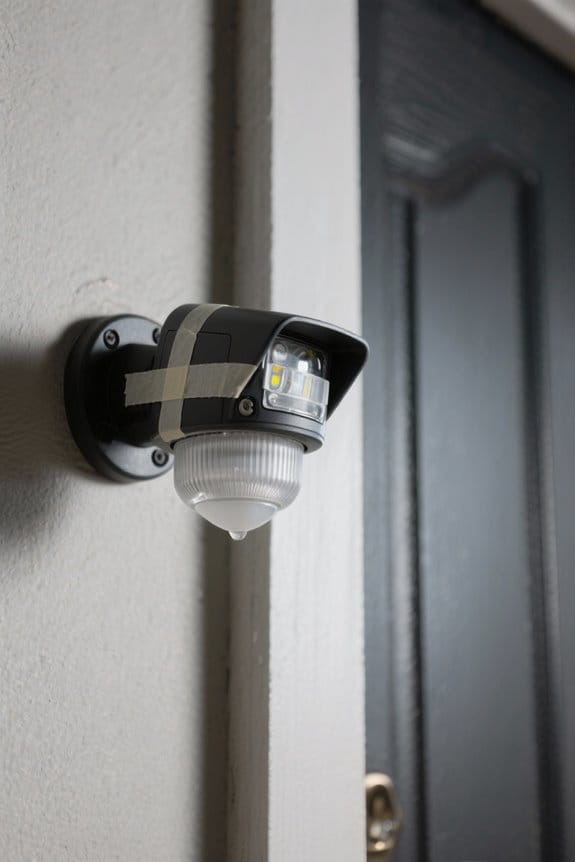
Ideal Mounting Height and Angle Recommendations
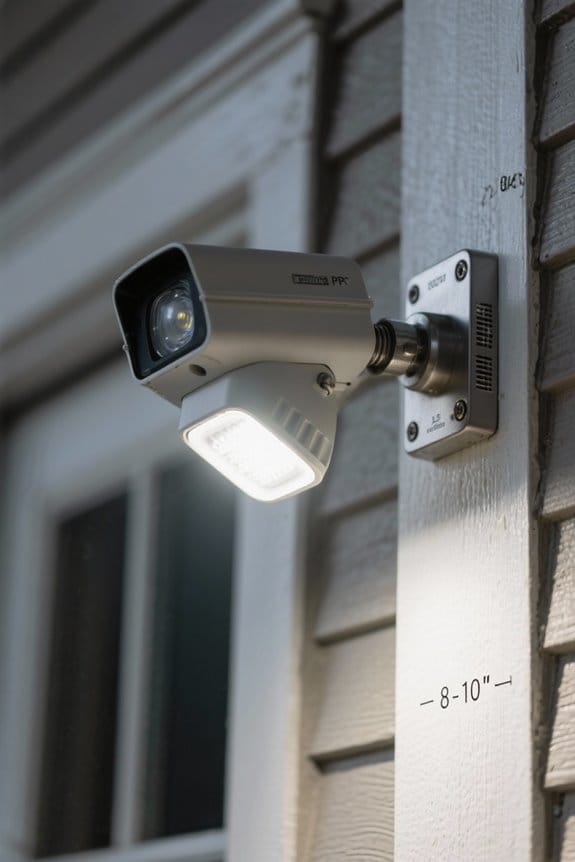
For porch and side-door installations, Motion Sensor bulbs should be mounted between 6 and 10 feet above grade, angled downward to concentrate detection on approaching people while reducing responses to traffic and small animals. 1. Mounting Height: Specify an ideal mounting height of 6–10 feet, higher for wider coverage, lower for focused short-range detection, and note that 8 feet often balances range and sensitivity. 2. Angle Recommendations: Aim sensors downward 20°–45°, adjust to focus on walk paths, avoid sky-facing angles that cause false triggers. 3. Line of Sight and Overlap: Maintain clear lines of sight, remove obstructions, and use multiple units at varied angles for overlapping coverage. 4. Timing and Calibration: Set on-time 10 seconds to 20 minutes, test sensitivity and refine periodically thereafter. When installing motion sensor lights, it’s crucial to consider the IP65 weatherproof rating that ensures durability against environmental factors such as rain and snow.
Strategic Placement Around Entry Points and Walkways
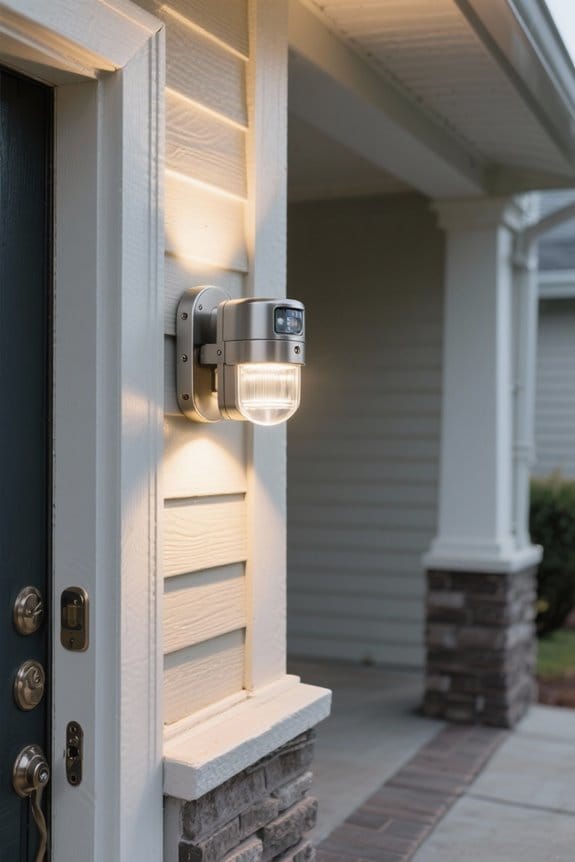
When positioning motion sensor bulbs around entry points and walkways, prioritize mounting height, detection angle, and unobstructed lines of sight to enhance coverage while reducing false activations. 1. Mounting and height: Place outdoor light fixtures 6 to 10 feet above grade to center the PIR sensors’ ideal zone on approaching individuals, angling units downward to concentrate detection on thresholds and walking surfaces, which reduces low-level triggers. 2. Coverage and alignment: Guarantee a clear line of sight along paths and door approaches, remove obstructions, and align units so overlapping field of view provides continuous illumination for longer walkways. 3. Placement density: Install lights at front, back, and side doors, use multiple units for porches, and verify sensor overlap with test walks to confirm consistent activation. For optimal results, consider using 2700K outdoor lights which offer a warm ambiance and are energy-efficient, reducing electricity costs by up to 90%.
Reducing False Triggers From Wildlife and Vehicles
Although wildlife and passing vehicles commonly trigger outdoor sensors, installers can noticeably reduce false activations by adjusting height, angle, detection range, and technology. 1. Placement and Angle: Mount sensors 7 to 10 feet high, tilt downward to favor human leg heat signatures, limit detection cone to under 30 feet to exclude small animal pathways and peripheral vehicle motion. 2. Sensor Technology: Use dual-technology units combining PIR and microwave sensors, rely on PIR for thermal discrimination to improve wildlife detection and reduce spurious activations from birds or branches. 3. Configuration and Timing: Employ sensitivity tuning, set schedules to avoid dawn and dusk peaks, and position fixtures away from windows and doors to prevent reflections or tree-induced triggers. Many outdoor lights feature weatherproof technology which ensures reliable performance even in adverse weather conditions. These steps guarantee predictable, professional performance and reliable.
Wiring, Power Options, and Safety Precautions

- Wiring, power options, and safety measures are fundamental when installing motion sensor bulbs near porches and side doors.
- Wiring methods: use 14 AWG conductors for 15-amp dedicated circuits, and 12 AWG when tying into existing 20-amp runs, maintain 90°C rated insulation, and keep splices in accessible junction boxes.
- Power sources: choose a properly rated branch circuit or a switched circuit, verify breaker capacity and load calculations, and consider low-voltage transformer options only if fixture specifications allow.
- Safety measures: de-energize the circuit at the breaker, confirm zero voltage with a tester, adhere to local building code requirements, label breakers after installation, and consult a licensed electrician for complex or unfamiliar configurations. Proper documentation and permits reduce liability and guarantee long-term reliability.
- When selecting motion sensor bulbs, consider energy-efficient options such as LED bulbs to reduce electricity costs while maintaining brightness.
Weatherproofing and Mounting Best Practices
Several primary weatherproofing and mounting considerations are vital for reliable outdoor motion sensor bulb installations, including fixture ingress protection, sealing techniques, mounting height and orientation, and the use of weatherproof enclosures. 1. Fixture selection: Choose weather resistant materials and rated enclosures, verify IP rating for moisture and dust resistance, prefer corrosion‑resistant metals or UV‑stable polymers for outdoor fixture durability. 2. Mounting height and orientation: Install sensors at least seven feet above ground, angle to avoid false triggers, secure with tamper‑resistant fasteners. 3. Sealing and junctions: Use rubber gaskets and silicone caulk, employ weatherproof junction boxes and fittings for electrical component protection, follow manufacturer and local code for wire gauge and grounding. 4. Maintenance: Inspect seals annually, replace deteriorated components promptly. Ensure outdoor lights have an IP65 waterproof rating to enhance durability against varied weather conditions. Guarantee documented installation records.
Adjusting Range, Time Delay, and Sensitivity Settings
How should an installer calibrate range, time delay, and sensitivity for an outdoor motion sensor bulb to achieve reliable detection while minimizing nuisance activations? 1. Range: Perform range adjustments by testing activation at distances between 10 and 30 feet, walk-test gradually, note detection zones, and mask portions of the Fresnel lens with plastic tape to limit unwanted coverage near streets. 2. Time: Set time settings to keep lights on from a few seconds up to 20 minutes, choose shorter durations for frequent traffic areas and longer for infrequent use, verify user needs. 3. Sensitivity: Conduct sensitivity calibration to avoid false triggers from small animals or passing vehicles, reduce gain incrementally, retest after repositioning the sensor, and aim for consistent activation by people for safety. Consider lights with adjustable timeout settings to accommodate different user preferences and ensure optimal performance in varying outdoor environments.
Integrating Motion Lights With Smart Home Systems
When integrating motion sensor bulbs with a smart home platform, installers should verify protocol compatibility, signal strength, and firmware version to affirm reliable operation. 1. Compatibility and Networking: Select devices supporting Zigbee, Z-Wave, or Wi‑Fi, ascertain range exceeds 30 feet through walls, and place repeaters every 25–40 feet to maintain mesh integrity, enabling smart home automation and remote control. 2. Configuration and Automation: Configure schedules, sensitivity, and duration via manufacturer app or hub, synchronize with cameras for concurrent recording, and set geofencing rules to reduce false triggers and improve energy efficiency. 3. Alerts and Monitoring: Enable push notifications, log events for 30–90 days, test latency under 200 ms, and document firmware update procedures for reliable operation. Installers should perform quarterly audits and signal checks. Ensure that motion sensor lights have a long operational lifespan of 35,000+ hours to reduce maintenance needs and ensure consistent performance.
Minimizing Light Spill and Neighbor Disturbance
Why should installers prioritize precise placement and aiming of motion sensor lights to minimize light spill, reduce neighbor disturbance, and preserve effective pathway illumination? 1. Mounting and aiming: Position fixtures at least 7 feet above ground, aim them downward, select shielded designs or adjustable beams to limit glare and control beam spread, and use light shielding techniques such as baffles or full-cutoff housings. 2. Sensor configuration: Install away from windows and doors to avoid nuisance activations, employ dual-sensor technology to reduce false triggers, and configure sensitivity and range for targeted coverage. 3. Community considerations: Integrate neighbor notification systems when schedules change, follow community lighting guidelines, and use smart scheduling to minimize nighttime disruptions. These measures balance security performance with neighborhood comfort and compliance standards. Additionally, using energy-efficient lights can save up to 88% on energy costs while maintaining effective outdoor security.
Maintenance, Bulb Selection, and Longevity Tips
- Inspection and cleaning: Establish maintenance routines for sensors and bulbs, schedule quarterly checks, wipe lenses with lint-free cloths, and remove insect nests or debris that degrade detection and lumen output. Technicians should verify sensor alignment within ±5 degrees and confirm mounting height of 2–2.5 meters for ideal coverage.
- Bulb selection and settings: Choose LED motion-sensor bulbs rated for outdoor use, with correlated color temperature 2700–4000K and adjustable brightness, to balance security and energy efficiency. Select models with minimum 25,000-hour bulb lifespan and solid-state drivers rated for frequent cycling.
- Installation and longevity: Use weatherproof fixtures, guarantee dry junction boxes, and avoid rapid on-off cycles to preserve electronic components. Regular maintenance, such as cleaning, enhances longevity; warranties should be reviewed for product support. Periodic firmware updates and manufacturer-recommended replacements increase reliability and reduce unexpected failures system downtime.
Frequently Asked Questions
Where Is the Best Place to Put a Motion Sensor Light?
If thieves had manners, the best place is above the entrance, where sensor height six to ten feet guarantees coverage; outdoor placement should avoid obstructions, and angle adjustment aims at walkways, security politely applauds nearby.
Where Should You Not Place a Motion Sensor?
Not on busy streets, near doors or windows, by heat or airflow sources, unstable mounts, or obstructed vegetation; these Inappropriate locations create Sensor interference, cause false activations and raise Privacy concerns for residents or passersby.
What Is the Best Position for a Motion Sensor?
Isn’t the best position six to ten feet high, angled downward toward entry points? Observer cites installation height recommendations, adjusts sensor sensitivity settings, uses fixture orientation strategies to minimize false triggers and maximize overall coverage.
What Is the Disadvantage of Outdoor Motion Sensor Lights?
The disadvantage is unnecessary activation and missed detections, creating outdoor safety concerns, light sensitivity issues from weather or wildlife, and increased maintenance; additionally installation challenges and visibility can reduce effectiveness and invite misuse or vandalism.


